After my previous warping catastrophe, I started again with some fresh yarn (I’m not sure if I’ll be able to recover any of the previous mess), this time in two halves of 90 warps each, which made it easier to handle. It’s done in one continuous thread, forming a new warp from each back and each forth, while creating a ‘cross’ at one end to order the threads, and using additional thread (here in green) to group them in (in this case) groups of ten. Getting the resulting 180 warp ‘ends’, in perfect order, was a bit stressful, but in the end quite straightforward.
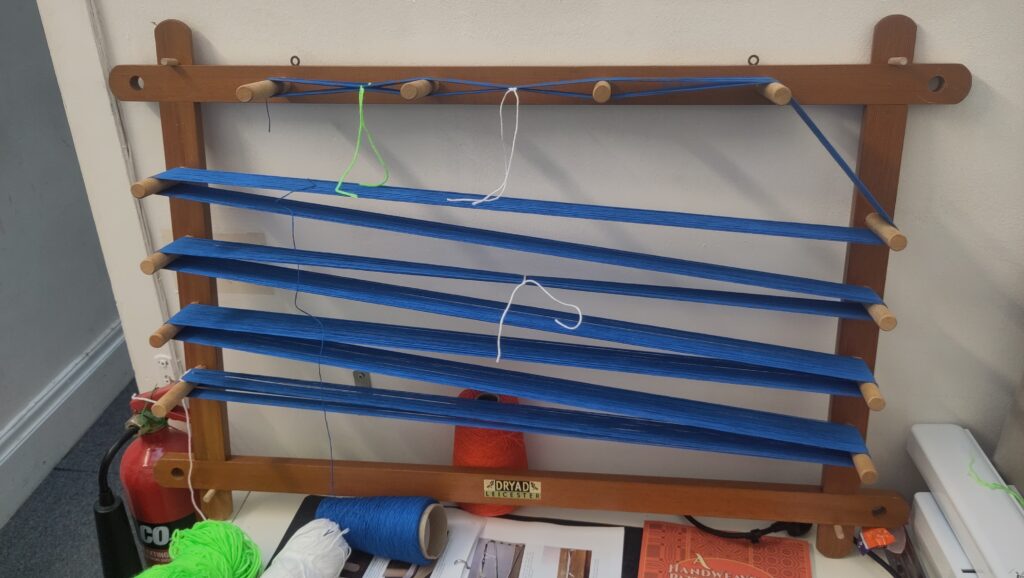
There is only one ‘correct’ order of the discrete threads (although at this point there’s only one single thread, going back and forth around the warping board), and you have to maintain that order perfectly at the ‘cross’, otherwise everything is lost. This is the digital, discrete world of handweaving, and it’s exactly the same as in modern computing – there’s a lot of hidden engineering work in creating and maintaining a discrete, perfect environment in a noisy, continuous world. When you’re having to do this painstaking work by hand, it hits differently. Our language is full of textile metaphors and this is why – working with threads structures your thinking as a fully embodied philosophy.
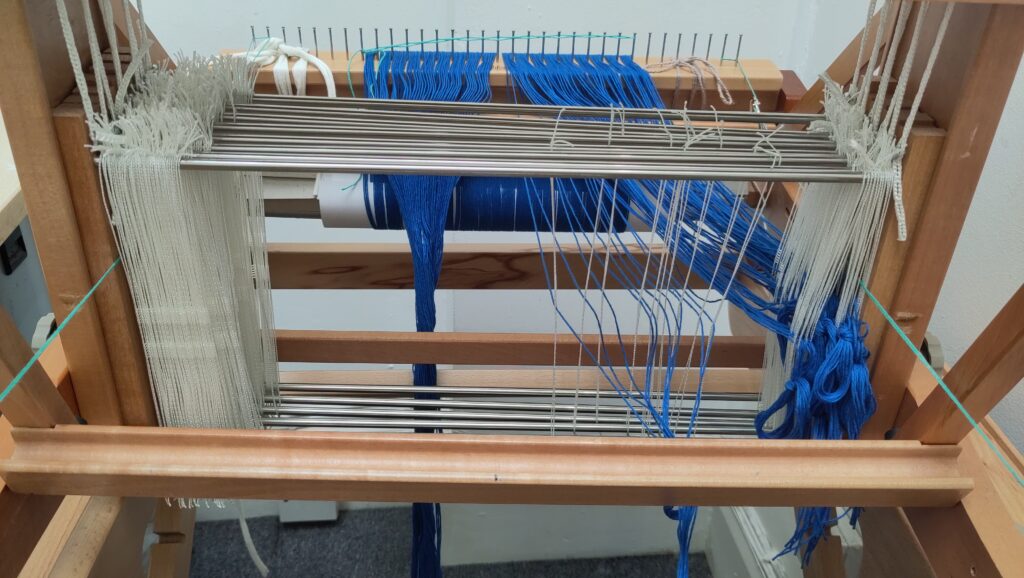
Getting the warp on to the loom so the 180 threads were well distributed, took some time, pulling at the threads to bring any loose ones under equal tension with the others, combing at it with my fingers to avoid tangles. When it looked good, rolling some of it on to the back beam, and repeating the process. Warp threads are all about order under tension.
Next, the threading. I have an eight-shaft loom, so threading is a case of threading each warp thread through a string heddle attached to one of the eight shafts. The goal here is to be able to lift threads in eight groups – each thread attaches to one shaft, but you can lift more than one shaft and their warps at once.
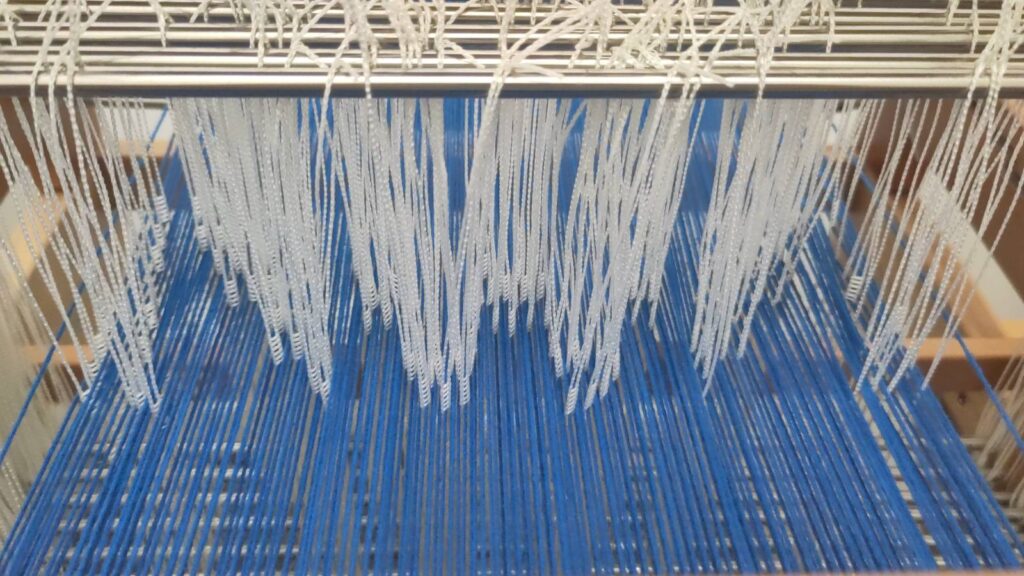
I’d previously re-threaded the warp that Seiko had helped me with, and had found it really difficult, but after watching some youtube videos was more prepared this time. I used the levers to select the right shaft for each heddle, lining up ten string heddles, before arranging the ten threads on around the fingers on my left hand, and then quickly threading them through with a special tool for hooking the threads through the heddles.

The binary grid shows the arrangement of the threads on the shafts. Although it’s quite fiddly, as a crackle weave it is formulaic, with a simple “up two, down one” motif connected on the diagonals. As with a lot of weaving, I found myself identifying and following little rules for myself as I went a long, to make it easier to remember the pattern and spot mistakes. It’s pretty satisfying to see all the threads in place!
I did miss one mistake – I got two threads the wrong way around. The first test weaving is below – you can see where I swapped the threads over into the right place. I just had to pin them to the textile so that they get woven in.
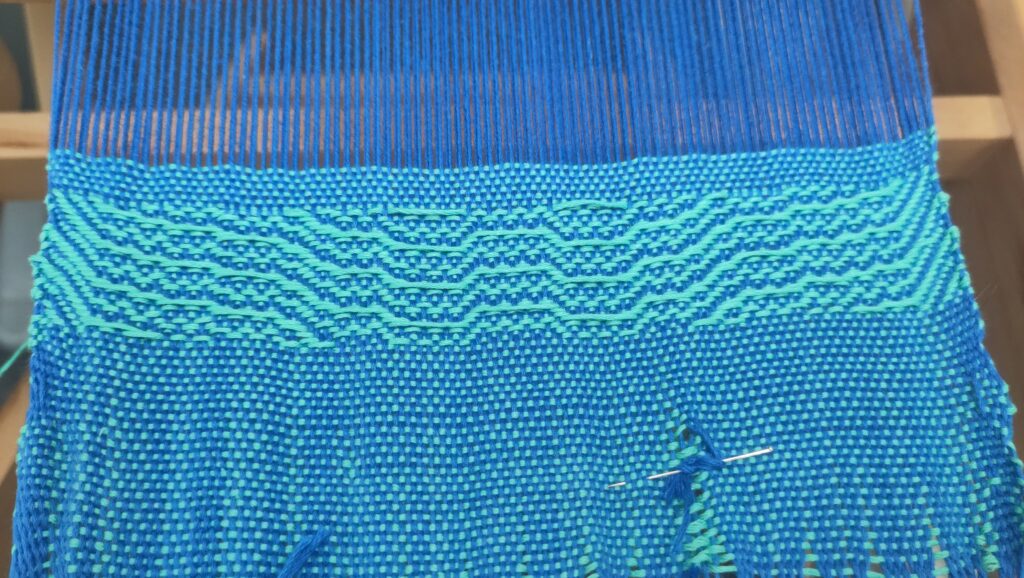
You can more or less see the pattern of the threading in the weave, good for testing. This was done by lifting three of the shafts, passing a weft through the ‘shed’ gap that this created, then shifting the selcted shafts over by one, passing the weft back through the shed, and repeating. The fun comes with more complex lift plans though. When designing the threading in AdaCAD (see screenshot below), I used a floor loom simulation to weave ‘as drawn in’, creating a lovely interference pattern.

The AdaCAD screenshot shows my experimental ‘crackle’ operation in action. The small grid at the top on the left is the ‘motif’, that is repeated along the path in the grid to its right. Additional steps are added to ‘connect’ the path, creating the structure in the orange pane to the right of that. As I understand it, this is the basis of crackle weave. This is then mirrored, to create the symmetrical threading. You end up with a system where you can independently change the crackle motif, the crackle path, the tie-up, the orientation of the treadling etc, each having a massive influence on the resulting weaving pattern shown in the bottom right. This isn’t what the weave will actually look like either – for that you have to weave it, and see what the threads do. Changing the colours of the warp and weft can completely change the outcome too – alternating between colours can transform the outcome into a kind of wild glitchy houndstooth.
Anyway after all this warping and threading I’m really looking forward to seeing what this looks like on the textile. With all the small patches of repeated bindings in the pattern, I’m hoping it’ll be interesting.. I’m also looking forward to improvising a lift plan to see what I other patterns I can generate from this threading.