...and why I walked away
Posted on by Adam Wespiser

I step down my front steps and into the brisk morning. I’m not dressed for January in New England, but fortunately I’m not going far. My hands grip a hastily constructed cardboard package, and beneath me is too much slush for slippers. I pass two houses before reaching my destination, peeking inside the front bay window as I go. No one’s home. I drop the package off on the brick stairs, fire a text—“dropped off”—and return to my apartment to find my dog nervously waiting at the top of the steps. Another 3D printed shipment complete!
This 3D printing business started with the help of my dog, at the time a puppy, and his desire to see my neighbor’s puppy. We (the humans) began talking, and as we ran through a conversation about dogs, the topic came to his trading card business. He’d source cards all over the internet for his daily WhatNot auctions with thousands of followers. Impressive—not only a home business doing real volume, but a lens into a world I had no idea existed.
I eventually noticed he had a 3D printed card stand, and with a printer at home, I offered to make him one myself. “Great,” he said, “I can sell them.”
The first test was whether I could print a functional card stand: hold a card vertically without falling over that wasn’t geometrically impossible to print. This is where I’d like to say, “my years of product design experience made this easy,” but I can’t. In software, you engineer a loop, here was my loop: print a piece, realize it’s unstable, tweak the design, repeat. All while fighting my CAD model in Onshape to stay organized and extensible while using my iPhone 13 as a stability test.
Eventually, the trick became clear: to make a card stand balance, you either use a thicker geometry that slows down printing, or you add weight to the base, seal it up, and leave the customer with something that feels more substantial than a plastic trinket, inspired by the Apple “impute value” philosophy behind their packaging.

With the first print done, the process evolved into a stream of client requests for images and names, design iteration which dominated the timeline, documenting the stand, customer approval, then handing off the production order to my neighbor to ship. All of this happened over text—not an organized workflow system, but good enough to handle a weekend’s worth of work, one weekend at a time. For a moment, the business worked. In reality, this was the easy part.
![]()
The first real system test was a piece my neighbor wanted for a family member, just like a regular order, but with a bit more pride on the line. The logo was the Boston Celtics logo. The problem? It’s not a minimal, modern logo; it’s a detailed, hand-drawn image from 1946.
The starting issue was getting a 3D printable model of the logo. I spent about 30 minutes trying to model it in CAD, checked my progress, and was less than a quarter done. Instead, I found a “coffee coaster” version of the logo online and modified the card stand base to fit a resized coaster. The CAD detour was the first clear signal that the process was broken enough to need fixing, but the problems kept coming.
The next conundrum: the Celtics logo has 6 colors, but my printer could only do 4 at the time. Expanding your plastic filament palette requires upfront investment, and color matching is hard—especially when you’re partially color blind. With the prints up to that point, I could get away with a “closest” match, like teal being light or dark green depending on how it matched the rest of the print. A 4-color Celtics logo exposed me, as I had to pick three different colors, collapse them into one, and hope the intensity values (brightness) wouldn’t turn details into a puddle of mud. I was able to take the tan, gold, and dark brown and compress them into the closest color, but the intensity values never felt right. When a design uses multiple colors, you just can’t reduce the colors and expect that same image.
The first print of the Celtics logo came out with the Celtic tobacco pipe totally mangled. Print resolution has an easy fix: just switch to a smaller nozzle and wait about 4x longer due to inverse square scaling of flow rate to nozzle diameter. I printed it once—nozzle clogged, there goes the margin. Tried again—another clog, there goes my inventory.
According to several informative YouTube videos, the methods I tried to unclog the nozzle should have worked: using softened plastic to pull it out, pushing in precision wires to unjam, even holding the nozzle with pliers over the stove to melt it clear. One minor burn that sent a hot nozzle flying across my floor later, with the sweet smell of burnt PLA plastic wafting through my living space, I was done with the 0.2mm nozzle. I’m sure there’s some way to unclog a nozzle and change the printing process to avoid future clogging, but I wasn’t going to get it working that night. Two nozzles down and I was underwater on the sale.
After these several iterations, we finally got the card stand sent out.
Inspired by failures of printing the Celtic logo, the details of the system locked in: all prints used PLA from a single source known for color selection and reliability. I locked in 0.4mm nozzles for all future prints. I also upgraded my setup: a second printer would prevent any problematic or failing prints from blocking the flow, and a third AMS unit expanded from 4 to 8 colors for one of my printers. I also gained a better sense of what client designs and ideas I could reject outright, and what was going to take an unusually long time to make work.
So the system worked, but hinted at a larger problem: everything in the process required me. That’s not a business, it’s a job!

Instead of designing unique geometry for every print, we standardized the format: a back plate, the card stopper in front to prevent the card from sliding off, and the front text. This format made the card stands into parts that were easier and faster to print, and served as a model for customers to understand what could be customized.

Post-Celtics print, every part of the printing process was standardized and simplified. Beyond the limitations on nozzles, colors, and new gear, I started stocking replacement parts for everything that touches plastic on the printer or could break during handling. Still, if a part like a motor broke and I needed a few days to get a new one, it wouldn’t totally stop progress.
My goal was simple handling: be able to wake up in the middle of the night and move the process forward, then go right back to bed without a cortisol spike or an “oh shit, this stretches the timeline” moment. Diagnose, displace, then replace what failed.
The only problem?
Instead of a scalable business, I had built a part-time job that relied on me to do the work.
Some steps could be automated, but design still took about an hour of my time, and rounds of revision dragged things out. I golfed down a lot of the process, but the printer still required interrupting interventions. Finally, assembly was manual, and even if all the parts could magically summon themselves, the assembly was detail-intensive labor.
On the economics, things worked.
At steady state:
- design time earned about $25/hour
- $3666 total revenue
- $3352 in expenses
- ~50 orders fulfilled
- ~3000 hours of logged print time.
The problem was what came next. After seeing everything go wrong at least once and stabilizing the system, I faced a decision: do I want 500 more orders to level up again? There wasn’t an obvious path to get help with design, automating the order process, or finding a color-capable print farm. So after raising prices once, I transitioned to large orders only (no design), and gradually wound things down.
3D printing is great for making a few of something: custom toys, bespoke lab equipment, or consumable plastic parts. What it’s not great at, in this context, is scaling to volumes where economies of scale matter. In other words, it’s mostly a design business.
There’s definitely a niche for custom parts and small-batch manufacturing, but the next level was a big lift away from the home business stage. I’d need significant growth in my design skills, like time investment into learning more tools like Blender. I’d also need business development to create an online storefront and build a customer base to keep the orders coming. Not to mention shipping orders. Already, I was bored of making card stands, and closing the income gap between this $25/hour side job and my software engineering career at a big tech company meant a shift in focus I couldn’t justify.

For now, I’m focused on being a better software engineer, printing gifts for friends and family, and trying to perfect a greyhound-sized squeaky toy: soft enough to bite and shake like prey, but durable enough to survive more than a few play sessions. I’m on iteration 10 right now, and with how often it’s “stolen” in the dog park, it’s a hit!
The card stands are complete. I didn’t shut it down because the business worked, but because I understood what comes next. Sometimes a thing that doesn’t scale is just fun to do

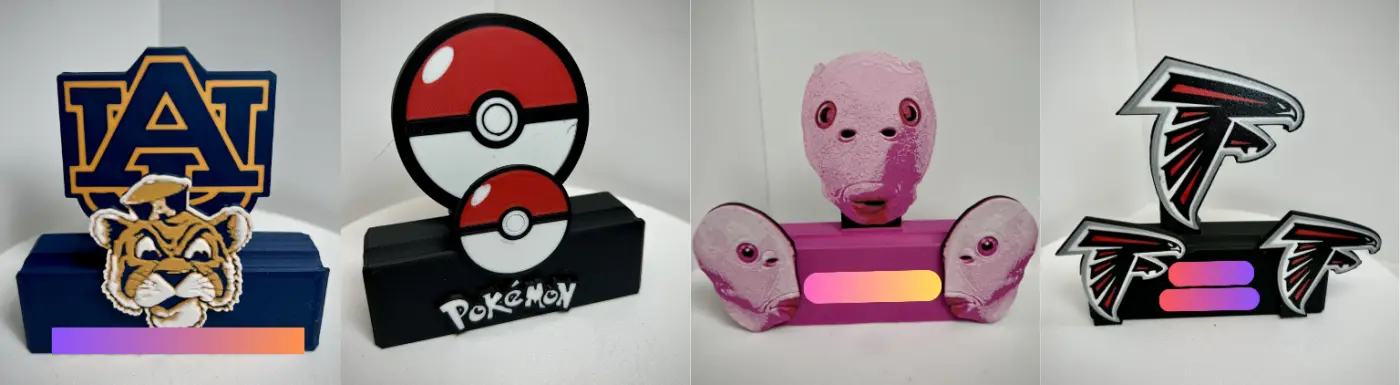
A final picture: several screenshots of the card stands in action