I read Amy Goodchild’s blog post about digitizing her handwriting in JavaScript a while ago and couldn’t stop thinking about it. I didn’t end up digitizing my own handwriting, but it pushed me toward a smaller idea: clamp a ballpoint pen to my 3D printer and let it write postcards for me.
This post is the story of getting there, including the part where my printer almost drove the pen straight through the bed.
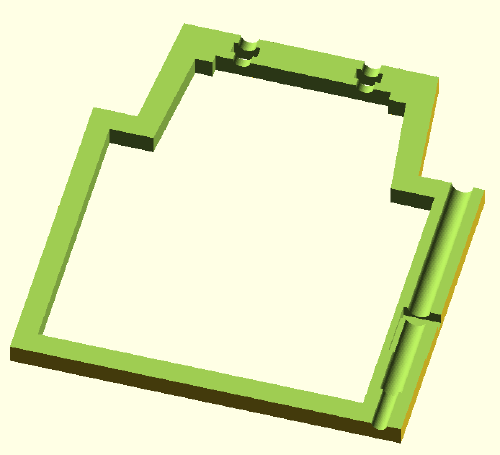
The pen adapter
I have an Elegoo Neptune 4 Plus. The first job was a way to mount a pen on the extruder, so I designed an adapter in OpenSCAD and printed it in PLA. It comes in three pieces.

The main piece wraps around the extruder and holds the ballpoint cartridge and a spring. The spring matters more than I expected. It lets the pen push down a little into the paper, so there’s enough pressure to write even if the surface isn’t perfectly level.
The second piece is a small U-shaped part that presses against the top of the extruder. Without it, the screws holding everything together would bear directly on the extruder, and I didn’t want to risk that.
The third piece is a tiny clamp that keeps the cartridge spring in place.

None of the parts are precise. PLA was fine, and I’d guess almost any filament would work. If you want to print your own, the STL files are on Thingiverse.

First test
Before doing anything clever I just wanted to know if the concept held up. I mounted the adapter, used the printer’s manual controls to drive the pen down onto a sheet of paper, and moved the axes by hand.
It wrote. Cleanly, even. That was enough to keep going.
Software
To generate something to write, I used Inkscape. Newer versions ship with a Hershey Text extension that converts text into single-stroke SVG paths, which is exactly what you want for a pen plotter. I typed some text and converted it.
Then I fed that SVG into svg2gcode, a web tool that turns SVGs into G-code. The setup is a bit manual: I moved the pen by hand to the lower edge of the paper to set my X and Y origin, then lowered Z until the pen just touched the surface and used that height for the pen-down command.
For my machine, pen down is:
G1 Z10 F100
and pen up is:
G1 Z15 F100
Second test (the one that didn’t work)
My plan was simple: take the generated G-code, send it to the printer as if it were a normal print, and watch it write instead.
It didn’t write. The printer has a safety routine that homes every axis before a print starts. Homing X and Y is harmless, but homing Z is a problem, because the pen and adapter sit lower than the extruder normally does. With the pen attached, homing Z means driving the tip into the bed.
I ran this test at very low speed, so nothing got damaged and the cartridge spring absorbed the contact. But no matter what I tried, I couldn’t disable the forced homing. Time for a different approach.
Custom software
The first test had already shown me the way out: the printer writes fine when I drive it with the manual controls, and those don’t trigger a home cycle. So if I could send manual movement commands one at a time, I could skip the homing problem entirely.
Digging around, I found that the Neptune runs Moonraker, which exposes both a REST and a WebSocket API for talking to the printer. That was the missing piece.
So I wrote a small tool that takes a G-code file and a printer address and streams the file line by line over a WebSocket connection. It’s nothing fancy, and the code is on GitHub.
Third test
Same workflow as before: Inkscape for the SVG, svg2gcode for the G-code, then my streamer to send it to the printer. I kept the speed low and set a high Z value on the first run so the pen would trace everything in the air, well above the paper. That let me confirm the motion looked right before committing to ink. Once I was happy, I dropped Z down to actually write.
It worked.
Setting up a new writing project
For my own reference, here’s the full routine for writing on a fresh sheet:
- Start the printer and home all axes before attaching the adapter, so the printer knows where it is.
- Mount the adapter on the extruder.
- Place the paper or postcard on the bed, with its lower edge parallel to the front of the bed.
- Hold the paper down with a few magnets.
- Manually drive to the lower-left corner of the paper and lower Z until the pen touches it.
- Note the X, Y, and Z values.
- In Inkscape, create your SVG and set the document size to match the paper.
- In svg2gcode, set the X and Y origin to your noted values and use the Z value for the pen-down command.
- Stream the G-code to the printer with g-code-streamer.
- For writing several identical sheets, leave two magnets as end stops so the next sheet lands in the same spot.
Wrap-up
This was a fun weekend project, and watching the machine work is oddly relaxing. Since it writes any SVG, it draws pictures just as happily as text, and it’s gotten me to send actual postcards to friends and family for the first time in years. Here’s a short clip of the plotter in action.