Apparently, one of my hobbies is making updates to my ergonomic setup, then blogging about it from an Amtrak train. I've gone and done it again.

My setup stayed static for some time, but my most recent iteration ended up letting me down and I had to change it again. It gave me a lot of useful information and strongly shaped how I approached this iteration. This new one is closest to the first one I wrote about in 2024, but with some major improvements and reproducibility.
First things first, though. Why am making I yet more changes to this setup?
Besides my constant neurodivergent drive to make things perfect, my setups all kept causing me some problems. In chronological order, here are the problems and neat benefits of each setup I used for at least a few months.
- My first one was difficult to adjust the keyboard width. You had to flip it over and loosen hardware from the bottom. It was also a little heavy. There's a limit to how far I can reduce weight when using a Keyboardio Model 100, but we can get closer. However, this rig was very fast to set up. It also did keep my keyboard at a good width.
- My second one used hinges made from fabric and hook-and-loop fasteners, which was neat but ultimately it fell apart, it was tedious to adjust, and it took a long time to set up. The big benefit of this setup was that it was extremely light. This was helpful when I was suffering from a lot of fatigue and POTS.
- My third one had a neat hinging mechanism which was useful for smaller spaces but wasn't much faster to set up. It used a smaller lighter keyboard, but ultimately that keyboard ended up relapsing my nerve pain.
- My fourth one, not previously written about, was... way too heavy. It was also a little tedious to setup, but the weight was its biggest problem. I made that one from off-the-shelf parts (mostly), with the goal of making something reproducible for others. And it worked with any laptop, not just ones with a 180 degree hinge like mine. But, with how heavy and annoying it was, it's not worth reproducing.
So my immediate previous version was heavy and tedious to setup. I had a trip coming up to Brooklyn, so I had to either make something more portable or leave my laptop at home. I decided to take my laptop, and did a design sprint to see if I can make my dream setup.
At this point I'll probably be working on this setup forever, but I hope I can stop if I am able to satisfy all my goals at some point. My dream setup has these characteristics:
- relatively lightweight: it's not going to get super light with both a laptop and my keyboard, but I want to minimize the weight beyond those
- solid mount for my Keyboardio Model 100: this keyboard is, vexingly, the only keyboard that keeps my nerve pain in remission. I need to use it.
- good laptop screen height: another problem with laptop use generally is that the screen is usually too low or the keyboard is too high. I want to make sure the screen is at a reasonable height so that I don't wreck my body through poor posture.
- durability: it needs to be pretty durable since I'm going to use this rig for travel. I don't abuse my laptop or my setup, but it has to stand up to regularly being taken in and out of a bag and being used in random places. It has to stand up to a variety of environmental conditions, too.
- as easy as opening my laptop: a lot of ergonomic problems stem from ergonomic setups being inconvenient, so if I can reduce that inconvenience, I can reduce the problems
- easily adjustable keyboard width: I shift around my keyboard position as my body asks for it, and having dynamic positioning helps me feel comfortable. I'd like to be able to do this with little fuss, or else I won't do it (see the previous point).
- mounting points for accessories: I use an eink tablet to take notes, and would love to be able to put it on a little mount on the rig. I also want to be able to mount USB hubs or the mic I use for Talon. Having options for attaching accessories would make it not just equivalent to a laptop, but far more flexible.
- reproducible: This setup gets a lot of comments from people, and it solves real problems for me that other people have as well. I want more people to be able to use it.
- interesting: whenever I take this thing out, I get comments on it. It's how I find other engineers and software folks: most people are all "ignore the lady with the weird rig" but y'all actually strike up conversations with me about it. (If you ever run into me in public, please do talk to me! Even if it looks like I'm working!) I don't want this social benefit to go away!
- attractive aesthetic: I've been fine using my homebrew wood setups, but they're so obviously homemade and don't look good. My dream is that it would look like it's not homemade, and would simply look like it's how the computer is intended to be used.
So, you know, it's not like I want a lot out of this setup. It's not like these are kind of a lot to all fit into one thing. I'm sure it'll be a piece of cake.
I use OpenSCAD for 3D modeling. It's pretty pleasant, though some things are hard in general (like roundovers and fillets on any more complicated shapes). My design to start is basically one of my previous versions: my split keyboard at adjustable width on a base, and a slot to hold my laptop vertically.
I started by measuring important dimensions, like how far apart I wanted my keyboard halves and the dimensions of my laptop. Then I compared these to my 3D printer's print volume, and started working out how I'd have to print it. The rig is wider than my 3D printer, so I had to split it up into parts. The slot would fit as a separate piece if I oriented it diagonally. The base itself would have to be split into two separate halves.
To join the halves and the slot, I decided to use dovetail joints. I'm familiar with them from woodworking, and I figured they'd give a strong join here as well. I added the library BOSL2 to generate the dovetails, and these were pretty easy to model in. Then I also made some keyboard mounts, which I attach using a camera tripod mount (the Keyboardio Model 100 has threading for this). This is where I ended up for my initial design.

When I printed the first pieces, I ran into a problem. The pieces came out alright, mostly, but there was this wavy defect on the top of it!

It ended up being (I think) that the print was not adhering well to the printbed. This was easily solved by washing it with some water and dish soap, then prints started coming out beautifully.
The other problem was that the sliders and rails worked too smoothly, and I realized that I'd need to have some way to lock the keyboard in place or it would slide around in a difficult to use way. I punted on this, and printed the whole thing. I knew I'd need another iteration on it for material reasons: I am printing the prototype from PLA, since it's easy to work with, but I wanted to print the final one from PETG for slightly better heat resistance.
So, onwards, and with a clean printbed, I was able to make the full first prototype! It was 3 parts which took 2-3.5 hours each to print, for a total print time of under 12 hours. I assembled the pieces and glued them together.


At this point I was able to use the setup to work on itself, which was really satisfying. I did need to make the keyboard lock in place for carrying it, but it was fairly stable on my desk at least.
Now it was time to make a few tweaks, and print the whole thing in PETG for its heat resistance. I did a few things this iteration: I carved out a honeycomb pattern on the base to reduce weight and filament; I added a nubbin and detentes to the keyboard slider to lock it in place where I want (in 10mm increments); I lengthened the keyboard rails to go further in; and I widened the keyboard slot for a less snug fit.
This time is when I met the challenge that is printing with PETG! I dried my filament and started doing some prototyping. I sliced apart chunks of my model to see if things fit together still, since that can change with materials. I also printed a test of my locking clicky mechanism for the keyboard, and good thing: it needed design changes, but the second print worked great (I modified the first with a knife until it fit, then measured the remaining material, and modeled that).
Then I printed it. And it came out pretty well! I mean, I had major stringing and bed adherence issues the first time I tried it, but with thorough bed cleaning and a nozzle wipe, it came out cleanly. I had one spot with a minor quality issue, but it's on the bottom and not visible.


And it's working out really well! Mostly!
The good things here are what make it usable. It is lightweight (about 280 grams), which is comparable to my lightest previous setup but that one fell apart promptly. It seems durable; we'll see over time, but it did survive multiple backpack loadings and a trip to Brooklyn today, where I hauled it around the city with me. And it's pretty fast to deploy: I can put it together in 15 seconds. The keyboard width is very easy to adjust, and it's solidly in place where it won't slide by accident. The laptop screen is at a good height. It's reproducible: others could print it as well, with access to the files. (I'm considering making them open source, but I don't think they're quite ready to share. It needs some iteration first.) And I quite like the way it looks.
However, it's not all good. I want to make some changes to it soon, after a break from the long print times and iterations. Here's the list to address:
- Replacements for the camera z-mounts: I'd like to 3d print something for this, and it will be the first iteration I make. The z-mounts are over a pound of metal together, so I could bring down the weight a bit more this way. However, it may be not worth it.
- Add non-slip feet and extra rails on the bottom: I'd like to raise it off the surface it's on a little bit and add some rails on the bottom for a little more rigidity.
- Make it more rigid: it is a little bit floppy, but not to the point of being distracting when using it. I'd like it to feel a little sturdier, especially if anyone else were going to use it.
- Add attachment points for accessories: on Friday, someone at Recurse Center saw my coffee perched in the middle and he suggested a cupholder. I'd like that, or mounts for my mic or USB hub or myriad other things. I can use the honeycomb grid for attachment points, if I add those rails/feet on the bottom to raise it all up a little bit.
- Make it modular and customizable: it only works today if you have a split keyboard with a tripod mount on the bottom of it. So, that's not great for people who don't have the exact same keyboard I do! And if you have other laptops, well, it would need to be adjusted for that. I want to address this before releasing the files. (If you do have the hardware that makes this useful for you today, let me know. I'm happy to help people out with that, I just don't want to do a big public release.)
I don't know if addressing those is all feasible, or if it will satisfy my dream setup. But I do know by now that I'll not be done with this for a long, long time. Everyone needs a hobby, apparently this is one of mine.
* * *
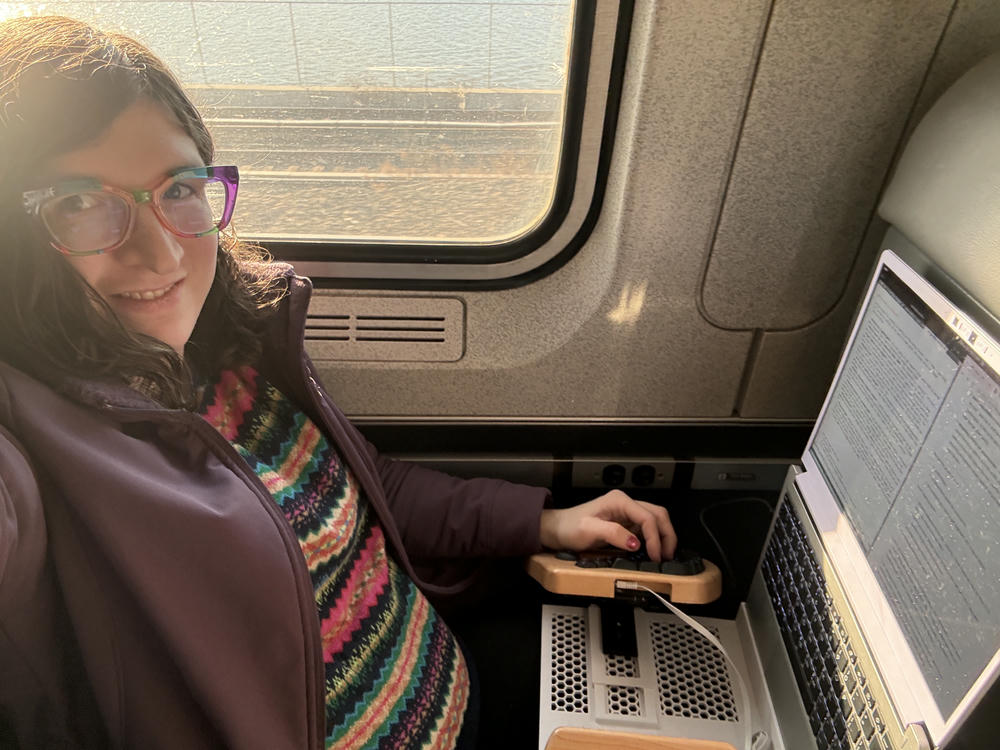
It's been surprisingly rewarding to work on my own ergonomic setup like this. I have made this setup specifically for health reasons: without it, I cannot use a laptop without severe nerve pain, and I rather like being able to work from anywhere. I have a very uncommon setup in that I'm able to use my Keyboardio Model 100 from a train; I've not seen that before.
The amazing thing about 3D printers is enabling this kind of solution. I made my previous versions in my workshop out of mostly wood. It took time and iteration was a big challenge. With a 3D printer, it's doable to design it and even send it off to someone else to print. And we can make exactly what we need, at relatively low cost. It's a technology that truly changes things in making custom tailored solutions far more accessible.
If you're looking for help on a software engineering project, please consider my consulting services.