
I’ve been playing with translucent PLA for lighting projects at home. Earlier this year, I built a diffuser/housing for our Lidl LED strip, since the light from the exposed LEDs was too cool and jarring. The design files are on OnShape, although they might need tweaking for the exact strip and required installation area.
A few viral videos have recently popped up in my YouTube feed showing bespoke 3D-printed lampshades. These ondulating membranes struck me as a surface that would arise from sweeping 2D profile as it’s raised and rotated through space. Making one from scratch seemed like a fun challenge (not to mention a nice Christmas present!).
2D profile
I started by graphing the following equation in Desmos (link will take you to the formula).
\[ r = \cos(5\theta) + 0.2\cos(9\theta) + 0.05\cos(200\theta) + 4\]
Something like this with big gentle ondulations on top of which small jittery ridges are overlapped.

Trying (and failing) 3D with OnShape
Desmos helpfully allows export to SVG, which I then converted to DXF in Inkscape so it can be imported into OnShape. DXF files can be added to OnShape sketches directly. So far so good. Creating the loft object in OnShape proved challenging though. A loft is pretty much what I described earlier, the volume or surface created as one 2D profile is interpolated to another. In this case, the second profile is just a point placed above the initial one. Something like this:
The loft tool provide a few nice settings, specifically the initial and final angle of approach to each profile. I want the shape to rise straight from the 2D contour and form a tangent to the final point. This way the top will form a nice dome rather than a sharp spike.
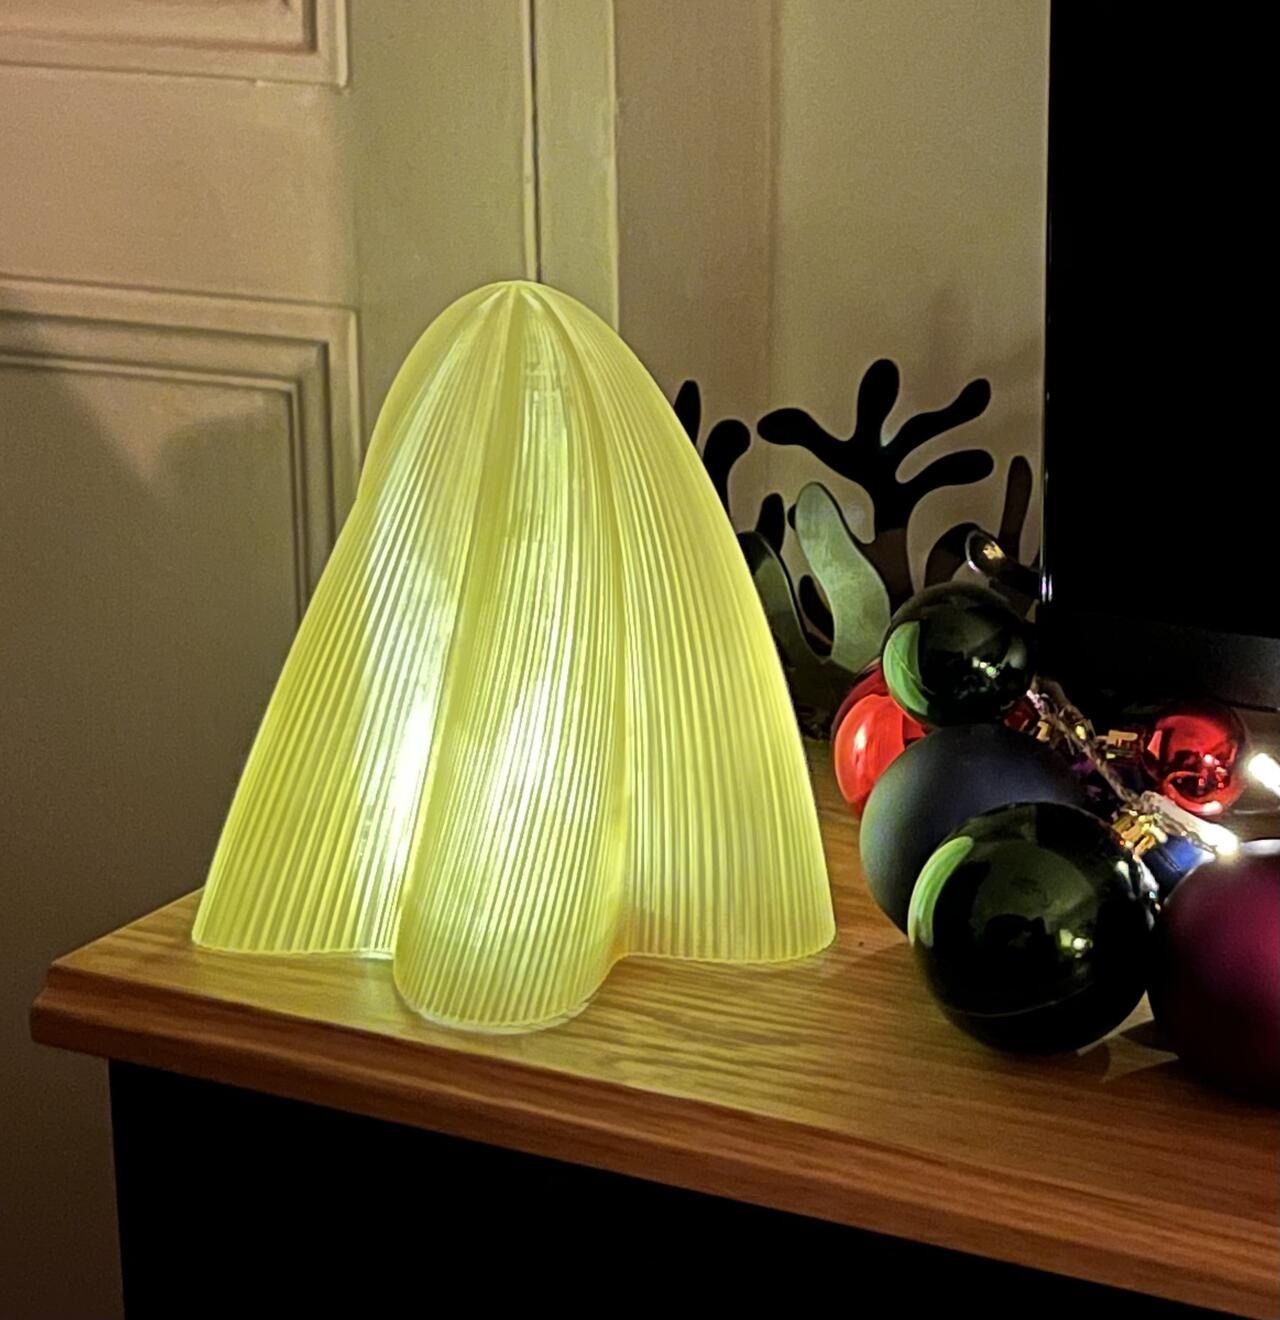
This complex organic-looking profile, made up of 1047 points, doesn’t really seem to fit OnShape’s main usecase. The loft operation kept failing to process (although it looks nice) and froze a couple of times too.

At this point, I had another idea. Since the point coordinates are known, it shouldn’t be too hard to create the shape in Python. This is not something I had done before, so I asked ChatGPT for advice. It gave me a script, which I was able to modify (repo here) to create the transition to a single point at the top (essentially scaling the profile depending on height). The results is a massive 70+MB STL file, which is currently printing …

Update: I’ve converted the Jupyter notebook to marimo so it’s easier to visualise the cross section and profile of the generated lampshade. You don’t even need to install Python to run this code, it will run directly in the browser using WebAssembly (link).