Table of contents
I have come to appreciate coding agents to be valuable tools for working with computer program code in any capacity, such as learning about any program’s architecture, diagnosing bugs or developing proofs of concept. Depending on the use-case, reviewing each command the agent wants to run can get tedious and time-consuming very quickly. To safely run a coding agent without review, I wanted a Virtual Machine (VM) solution where the agent has no access to my personal files and where it’s no big deal if the agent gets compromised by malware: I can just throw away the VM and start over.
Instead of setting up a stateful VM and re-installing it when needed (ugh!), I prefer the model of ephemeral VMs where nothing persists on disk, except for what is explicitly shared with the host.
The microvm.nix project makes it
easy to create such VMs on NixOS, and this article shows you how I like to set
up my VMs.
See also
If you haven’t heard of NixOS before, check out the NixOS Wikipedia page and nixos.org. I spoke about why I switched to Nix in 2025 and have published a few blog posts about Nix.
For understanding the threat model of AI agents, read Simon Willison’s “The lethal trifecta for AI agents: private data, untrusted content, and external communication” (June 2025). This article’s approach to working with the threat model is to remove the “private data” part from the equation.
If you want to learn about the whole field of sandboxing, check out Luis Cardoso’s “A field guide to sandboxes for AI” (Jan 2026). I will not be comparing different solutions in this article, I will just show you one possible path.
And lastly, maybe you’re not in the mood to build/run sandboxing infrastructure yourself. Good news: Sandboxing is a hot topic and there are many commercial offerings popping up that address this need. For example, David Crawshaw and Josh Bleecher Snyder (I know both from the Go community) recently launched exe.dev, an agent-friendly VM hosting service. Another example is Fly.io, who launched Sprites.
Setting up microvm.nix
Let’s jump right in! The next sections walk you through how I set up my config.
Step 1: network prep
First, I created a new microbr bridge which uses 192.168.33.1/24 as IP address range and NATs out of the eno1 network interface. All microvm* interfaces will be added to that bridge:
systemd.network.netdevs."20-microbr".netdevConfig = {
  Kind = "bridge";
  Name = "microbr";
};

systemd.network.networks."20-microbr" = {
  matchConfig.Name = "microbr";
  addresses = [ { Address = "192.168.83.1/24"; } ];
  networkConfig = {
    ConfigureWithoutCarrier = true;
  };
};

systemd.network.networks."21-microvm-tap" = {
  matchConfig.Name = "microvm*";
  networkConfig.Bridge = "microbr";
};

networking.nat = {
  enable = true;
  internalInterfaces = [ "microbr" ];
  externalInterface = "eno1";
};
Step 2: flake.nix
Then, I added the microvm module as a new input to my flake.nix (check out
the microvm.nix documentation for
details) and enabled the microvm.nixosModules.host module on the NixOS
configuration for my PC (midna). I also created a new microvm.nix file, in
which I declare all my VMs. Here’s what my flake.nix looks like:
{
  inputs = {
    nixpkgs = {
      url = "github:nixos/nixpkgs/nixos-25.11";
    };
    # For more recent claude-code
    nixpkgs-unstable = {
      url = "github:nixos/nixpkgs/nixos-unstable";
    };
    stapelbergnix = {
      url = "github:stapelberg/nix";
      inputs.nixpkgs.follows = "nixpkgs";
    };
    zkjnastools = {
      url = "github:stapelberg/zkj-nas-tools";
      inputs.nixpkgs.follows = "nixpkgs";
    };
    microvm = {
      url = "github:microvm-nix/microvm.nix";
      inputs.nixpkgs.follows = "nixpkgs";
    };
    home-manager = {
      url = "github:nix-community/home-manager/release-25.11";
      inputs.nixpkgs.follows = "nixpkgs";
    };
    configfiles = {
      url = "github:stapelberg/configfiles";
      flake = false; # repo is not a flake
    };
  };

  outputs =
    {
      self,
      stapelbergnix,
      zkjnastools,
      nixpkgs,
      nixpkgs-unstable,
      microvm,
      home-manager,
      configfiles,
    }@inputs:
    let
      system = "x86_64-linux";
      pkgs = import nixpkgs {
        inherit system;
        config.allowUnfree = false;
      };
      pkgs-unstable = import nixpkgs-unstable {
        inherit system;
        config.allowUnfree = true;
      };
    in
    {
      nixosConfigurations = {
        midna = nixpkgs.lib.nixosSystem {
          system = "x86_64-linux";
          specialArgs = { inherit inputs; };
          modules = [
            (import ./configuration.nix)
            stapelbergnix.lib.userSettings
            # Use systemd for network configuration
            stapelbergnix.lib.systemdNetwork
            # Use systemd-boot as bootloader
            stapelbergnix.lib.systemdBoot
            # Run prometheus node exporter in tailnet
            stapelbergnix.lib.prometheusNode
            zkjnastools.nixosModules.zkjbackup
            microvm.nixosModules.host
            ./microvm.nix
          ];
        };
      };
    };
}
Step 3: microvm.nix
The following microvm.nix declares two microvms, one for Emacs (about which I wanted to learn more) and one for Go Protobuf, a code base I am familiar with and can use to understand Claude’s capabilities:
{
  config,
  lib,
  pkgs,
  inputs,
  ...
}:

let
  inherit (inputs)
    nixpkgs-unstable
    stapelbergnix
    microvm
    configfiles
    home-manager
    ;

  microvmBase = import ./microvm-base.nix;
in
{
  microvm.vms.emacsvm = {
    autostart = false;
    config = {
      imports = [
        stapelbergnix.lib.userSettings
        microvm.nixosModules.microvm
        (microvmBase {
          hostName = "emacsvm";
          ipAddress = "192.168.83.6";
          tapId = "microvm4";
          mac = "02:00:00:00:00:05";
          workspace = "/home/michael/microvm/emacs";
          inherit
            nixpkgs-unstable
            configfiles
            home-manager
            stapelbergnix
            ;
        })
        ./microvms/emacs.nix
      ];
    };
  };

  microvm.vms.goprotobufvm = {
    autostart = false;
    config = {
      imports = [
        stapelbergnix.lib.userSettings
        microvm.nixosModules.microvm
        (microvmBase {
          hostName = "goprotobufvm";
          ipAddress = "192.168.83.7";
          tapId = "microvm5";
          mac = "02:00:00:00:00:06";
          workspace = "/home/michael/microvm/goprotobuf";
          inherit
            nixpkgs-unstable
            configfiles
            home-manager
            stapelbergnix
            ;
          extraZshInit = ''
            export GOPATH=$HOME/go
            export PATH=$GOPATH/bin:$PATH
          '';
        })
        ./microvms/goprotobuf.nix
      ];
    };
  };
}
Step 4: microvm-base.nix
The microvm-base.nix module takes these parameters and declares:
- Network settings: I like using
systemd-networkd(8)andsystemd-resolved(8). - Shared directories for:
- the workspace directory, e.g.
~/microvm/emacs - the host’s Nix store, so the VM can access software from cache (often)
- this VM’s SSH host keys
~/claude-microvm, which is a separate state directory, used only on the microvms.
- the workspace directory, e.g.
- an 8 GB disk overlay (var.img), stored in
/var/lib/microvms/<name> cloud-hypervisor(QEMU also works well!) as the hypervisor, with 8 vCPUs and 4 GB RAM.- A workaround for systemd trying to unmount
/nix/store(which causes a deadlock).
Expand full microvm-base.nix code
{
  hostName,
  ipAddress,
  tapId,
  mac,
  workspace,
  nixpkgs-unstable,
  configfiles,
  home-manager,
  stapelbergnix,
  extraZshInit ? "",
}:

{
  config,
  lib,
  pkgs,
  ...
}:

let
  system = pkgs.stdenv.hostPlatform.system;
  pkgsUnstable = import nixpkgs-unstable {
    inherit system;
    config.allowUnfree = true;
  };
in
{
  imports = [ home-manager.nixosModules.home-manager ];

  # home-manager configuration
  home-manager.useGlobalPkgs = true;
  home-manager.useUserPackages = true;
  home-manager.extraSpecialArgs = { inherit configfiles stapelbergnix; };
  home-manager.users.michael = {
    imports = [ ./microvm-home.nix ];
    microvm.extraZshInit = extraZshInit;
  };

  # Claude Code CLI (from nixpkgs-unstable, unfree)
  environment.systemPackages = [
    pkgsUnstable.claude-code
  ];
  networking.hostName = hostName;

  system.stateVersion = "25.11";

  services.openssh.enable = true;

  # To match midna (host)
  users.groups.michael = {
    gid = 1000;
  };
  users.users.michael = {
    group = "michael";
  };

  services.resolved.enable = true;
  networking.useDHCP = false;
  networking.useNetworkd = true;
  networking.tempAddresses = "disabled";
  systemd.network.enable = true;
  systemd.network.networks."10-e" = {
    matchConfig.Name = "e*";
    addresses = [ { Address = "${ipAddress}/24"; } ];
    routes = [ { Gateway = "192.168.83.1"; } ];
  };
  networking.nameservers = [
    "8.8.8.8"
    "1.1.1.1"
  ];

  # Disable firewall for faster boot and less hassle;
  # we are behind a layer of NAT anyway.
  networking.firewall.enable = false;

  systemd.settings.Manager = {
    # fast shutdowns/reboots! https://mas.to/@zekjur/113109742103219075
    DefaultTimeoutStopSec = "5s";
  };

  # Fix for microvm shutdown hang (issue #170):
  # Without this, systemd tries to unmount /nix/store during shutdown,
  # but umount lives in /nix/store, causing a deadlock.
  systemd.mounts = [
    {
      what = "store";
      where = "/nix/store";
      overrideStrategy = "asDropin";
      unitConfig.DefaultDependencies = false;
    }
  ];

  # Use SSH host keys mounted from outside the VM (remain identical).
  services.openssh.hostKeys = [
    {
      path = "/etc/ssh/host-keys/ssh_host_ed25519_key";
      type = "ed25519";
    }
  ];

  microvm = {
    # Enable writable nix store overlay so nix-daemon works.
    # This is required for home-manager activation.
    # Uses tmpfs by default (ephemeral), which is fine since we
    # don't build anything in the VM.
    writableStoreOverlay = "/nix/.rw-store";

    volumes = [
      {
        mountPoint = "/var";
        image = "var.img";
        size = 8192; # MB
      }
    ];

    shares = [
      {
        # use proto = "virtiofs" for MicroVMs that are started by systemd
        proto = "virtiofs";
        tag = "ro-store";
        # a host's /nix/store will be picked up so that no
        # squashfs/erofs will be built for it.
        source = "/nix/store";
        mountPoint = "/nix/.ro-store";
      }
      {
        proto = "virtiofs";
        tag = "ssh-keys";
        source = "${workspace}/ssh-host-keys";
        mountPoint = "/etc/ssh/host-keys";
      }
      {
        proto = "virtiofs";
        tag = "claude-credentials";
        source = "/home/michael/claude-microvm";
        mountPoint = "/home/michael/claude-microvm";
      }
      {
        proto = "virtiofs";
        tag = "workspace";
        source = workspace;
        mountPoint = workspace;
      }
    ];

    interfaces = [
      {
        type = "tap";
        id = tapId;
        mac = mac;
      }
    ];

    hypervisor = "cloud-hypervisor";
    vcpu = 8;
    mem = 4096;
    socket = "control.socket";
  };
}
Step 5: microvm-home.nix
microvm-base.nix in turn pulls in microvm-home.nix, which sets up home-manager to:
- Set up Zsh with my configuration
- Set up Emacs with my configuration
- Set up Claude Code in shared directory
~/claude-microvm.
Expand full microvm-home.nix code
{
  config,
  pkgs,
  lib,
  configfiles,
  stapelbergnix,
  ...
}:

{
  options.microvm = {
    extraZshInit = lib.mkOption {
      type = lib.types.lines;
      default = "";
      description = "Extra lines to add to zsh initContent";
    };
  };

  config = {
    home.username = "michael";
    home.homeDirectory = "/home/michael";

    programs.zsh = {
      enable = true;
      history = {
        size = 4000;
        save = 10000000;
        ignoreDups = true;
        share = false;
        append = true;
      };

      initContent = ''
        ${builtins.readFile "${configfiles}/zshrc"}
        export CLAUDE_CONFIG_DIR=/home/michael/claude-microvm
        ${config.microvm.extraZshInit}
      '';
    };

    programs.emacs = {
      enable = true;
      package = stapelbergnix.lib.emacsWithPackages { inherit pkgs; };
    };

    home.file.".config/emacs" = {
      source = "${configfiles}/config/emacs";
    };

    home.stateVersion = "25.11";

    programs.home-manager.enable = true;
  };
}
Step 6: goprotobuf.nix
The goprotobuf.nix makes available a bunch of required and convenient packages:
# Project-specific configuration for goprotobufvm
{ pkgs, ... }:
{
  # Development environment for Go Protobuf
  environment.systemPackages = with pkgs; [
    # Go toolchain
    go
    gopls
    delve
    protobuf
    gnumake
    gcc
    git
    ripgrep
  ];
}
Running the VM
Let’s create the workspace directory and create an SSH host key:
mkdir -p ~/microvm/emacs/ssh-host-keys
ssh-keygen -t ed25519 -N "" \
  -f ~/microvm/emacs/ssh-host-keys/ssh_host_ed25519_key
Now we can start the VM:
sudo systemctl start microvm@emacsvm
It boots and responds to pings within a few seconds.
Then, SSH into the VM (perhaps in a tmux(1)
session) and run Claude
(or your Coding Agent of choice) without permission prompts in the shared
workspace directory:
% ssh 192.168.83.2
emacsvm% cd microvm/emacs
emacsvm% claude --dangerously-skip-permissions
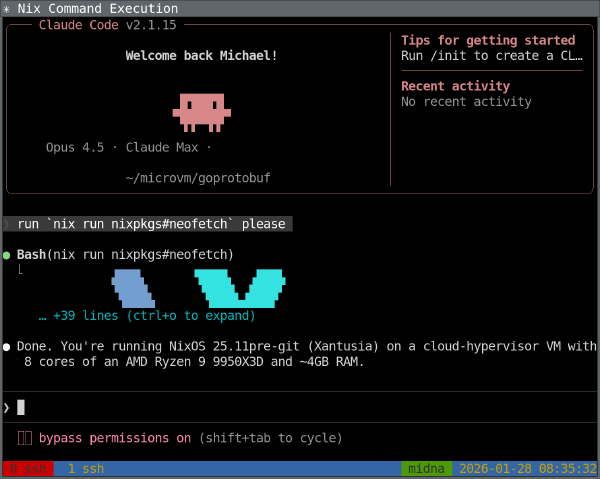
This is what running Claude in such a setup looks like:

Creating VMs with Claude
After going through the process of setting up a MicroVM once, it becomes tedious.
I was curious if Claude Skills could help with a task like this. Skills are markdown files that instruct Claude to do certain steps in certain situations.
I created .claude/skills/create-microvm/SKILL.md as follows:
---
name: create-microvm
description: Creates a new microvm Virtual Machine on midna for running Claude in, with source code repositories and build dependencies available inside the microvm. Use when the user asks to create a new microvm.
---

Inspect the existing structure at ~/machines/midna (NixOS configuration using Flakes), which includes several MicroVMs in the ~/machines/midna/microvms/ directory.

Then, create a similar structure for the microvm the user asked to create. Be sure to consider:

1. Create a new subdirectory for this microvm, named NAME (the microvm name).
2. Create an entry in microvm.nix similar to an existing microvm's, but:
3. Change hostname to NAME
4. Change IP address (e.g., 192.168.83.3): find used ones and chose next free
5. Change workspace share to /home/michael/microvm/NAME
6. Include build dependencies for the new microvm based on user request
7. Create ssh-host-keys directory
8. Generate SSH host keys
9. Clone/download source code repositories into this microvm based on user request

Once the microvm is defined, update ~/machines/midna to pull it in. To verify, build the config (but do not deploy).

You need to git-commit changes to the microvm before ~/machines/midna can see them.
When using this skill with Claude Code (tested version: v2.0.76 and v2.1.15), with the Opus 4.5 model, I can send a prompt like this:
please set up a microvm for Debian Code Search (dcs). see ~/dcs for the source code (but clone from https://github.com/Debian/dcs)
Now Claude churns for a few minutes, possibly asking a clarification question before that. Afterwards, Claude reports back with:
The dcsvm microvm has been set up successfully. Here’s what was created:
Configuration:
- /home/michael/machines/midna/microvms/dcs.nix - Project-specific packages (Go toolchain, protobuf tools, uglify-js, yuicompressor, zopfli)
- Updated /home/michael/machines/midna/microvm.nix to include dcsvm with:
- IP: 192.168.83.8
- tapId: microvm6
- mac: 02:00:00:00:00:07
Workspace:
- /home/michael/microvm/dcs/ - Workspace directory
- /home/michael/microvm/dcs/ssh-host-keys/ - SSH host keys (ed25519)
- /home/michael/microvm/dcs/dcs/ - Cloned repository from https://github.com/Debian/dcs
Build verified - The configuration builds successfully.
To start the microvm after deploying:
systemctl start microvm@dcsvmTo SSH into it:
ssh [email protected]
Wonderful! In my experience, Claude always got the VM creation correct.
Replicating this setup with Claude Code
In fact, you can go one step further: Instead of just asking Claude to create new MicroVMs, you can also ask Claude to replicate this entire setup into your NixOS configuration!
Try a prompt like this:
read https://michael.stapelberg.ch/posts/2026-02-01-coding-agent-microvm-nix/ — I want the exact same setup in my midna NixOS configuration please!
Conclusion
NixOS has a reputation of being hard to adopt, but once you are using NixOS, you can do powerful things like spinning up ephemeral MicroVMs for a new project within minutes.
The maintenance effort is minimal: When I update my personal PC, my MicroVM configurations start using the new software versions, too. Customization is easy if needed.
This actually mirrors my experience with Coding Agents: I don’t feel like they’re automatically making existing tasks more efficient, I feel that they make things possible that were previously out of reach (similar to Jevons paradox).
It was fascinating (and scary!) to experience the quality increase of Coding Agents during 2025. At the beginning of 2025 I thought that LLMs are an overhyped toy, and felt it was almost insulting when people showed me text or code produced by these models. But almost every new frontier model release got significantly better, and by now I have been positively surprised by Claude Code’s capabilities and quality many times. It has produced code that handles legitimate edge cases I would not have considered.
With this article, I showed one possible way to run Coding Agents safely (or any workload that shouldn’t access your private data, really) that you can adjust in many ways for your needs.
Did you like this post? Subscribe to this blog’s RSS feed to not miss any new posts!
I run a blog since 2005, spreading knowledge and experience for over 20 years! :)
If you want to support my work, you can buy me a coffee.
Thank you for your support! ❤️