early 2026
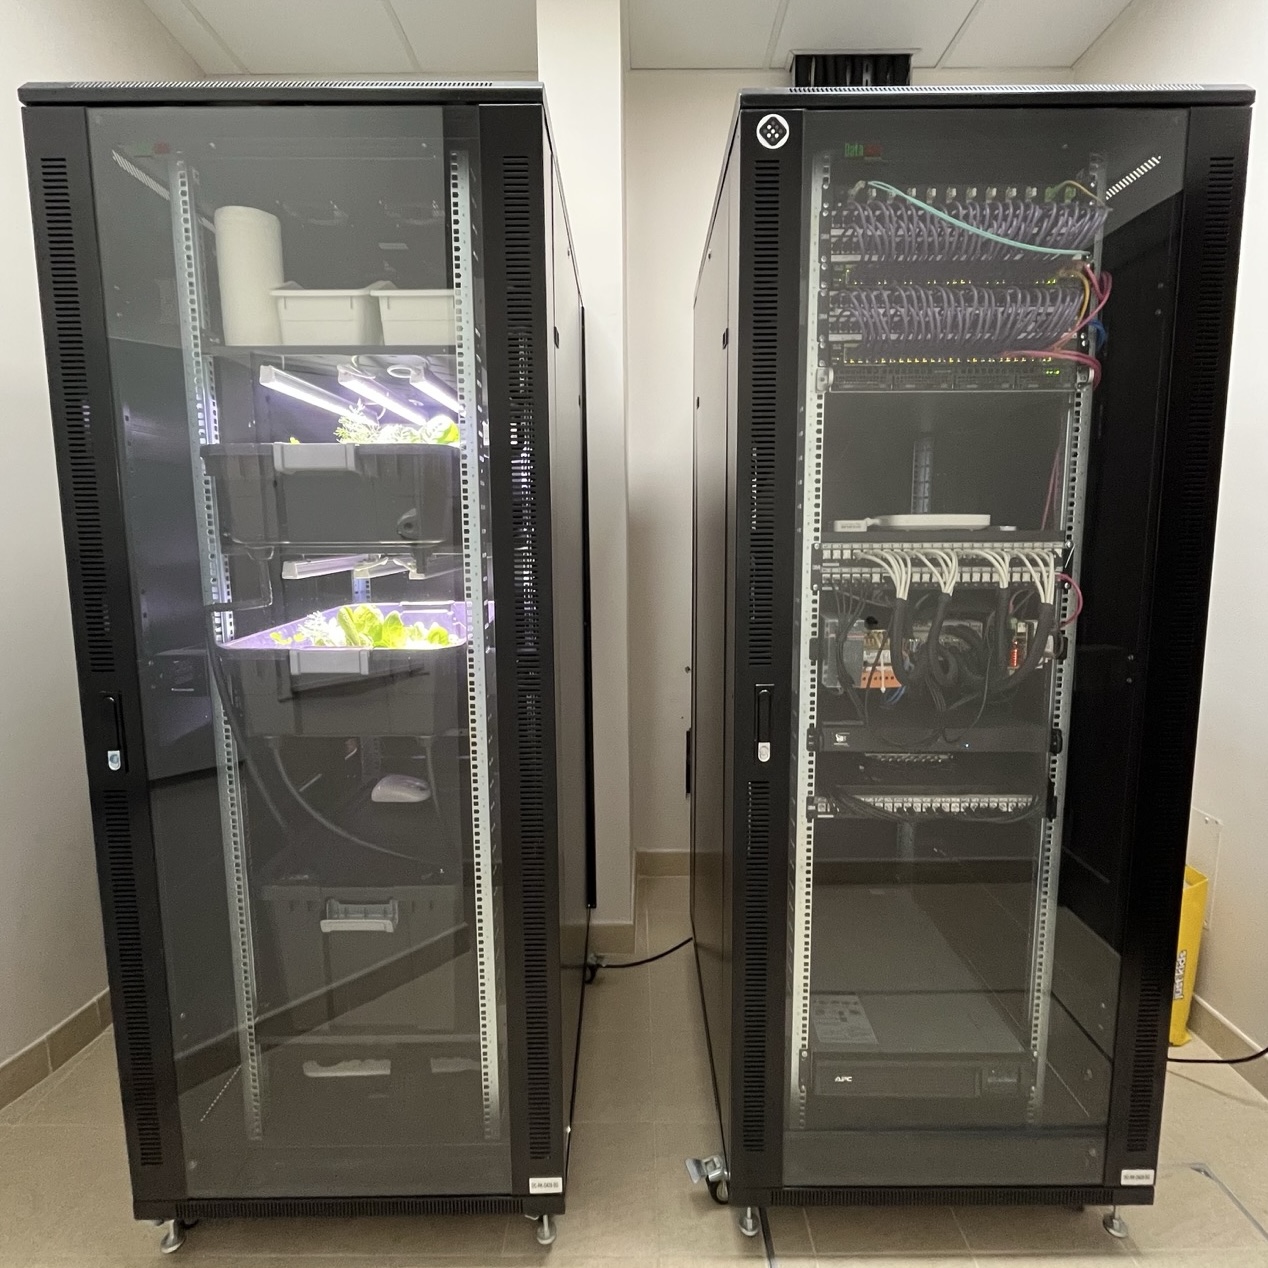
i started growing lettuce in a spare server cabinet.
this is, for many reasons, a terrible idea. here's how i did it.


backstory
for reasons i won't explain here (because i genuinely can't) we ended up with two whole 42u rack cabinets when we only really needed about 10u. also, it seems like the door frame for this room was installed after these were wheeled in so simply pushing the extra one out without taking it apart isn't going to work.
as fun as it sounds to go out and hoard 42u's worth of equipment to fill the void of my empty cabinet, i simply have no interest in running any of it. i want less computer, not more. in fact i've always dreamed of quitting computers and starting a farm. growing lettuce in the extra server cabinet just seemed like a good stepping stone. maybe.
hydroponics theory
the design i went for is a flood and drain system. it's apparently also called ebb and flow.
these work by growing the plants in growth medium (rock-wool, perlite, clay balls) in individual plastic or fabric pots.
these are placed in trays that regularly get flooded with nutrient-rich water pumped from a reservoir.
an illustration of a flood and drain system. consistent perspective is not my strong point.
the flood cycle runs a few times a day. it is short, just enough to wet the roots of the plants. depending on your pump, this is usually in the order of a couple of minutes.
to make sure the water does not go above a certain level in the flood cycle, most flood and drain tray designs have two holes at the bottom. one is an inlet connected to the pump. the other is a drain with an adjustable height, which drains away any overflow water.
the system during a flood cycle.
strangers on the internet often say flood and drain systems are the worst way to grow anything other than mould and algae. they are probably not wrong. however, these systems are also very simple, which means within my grasp. so here we are.
parts list
- a server cabinet. preferably one you don't even know how it got there.

- grow lights. there's a whole science looking into which frequencies work best for growing what. but i'm no light scientist so i ordered the ones with the quickest shipping.

- rack-mount shelves. i got mine from a local network equipment shop.
the shopkeeper fetched them from somewhere outside the shop and clearly made up the price on the spot. i chose not to ask too many questions.
- storage boxes to act as reservoir and grow trays. these sterilite modular stackers fit a server rack almost too perfectly. i have 38 litre ones for the plants and a 72 litre one for the reservoir.
they do make specialised trays for flood and drain systems, which have much better drainage. but they don't come in server rack size. otherwise this page would not be this long, now, would it?

- an aerator, an airstone, and tubing to connect them. this is to keep the water oxygenated. pet shops often sell these.

- flood and drain kit. these are the two plugs for the holes that you're going to make in your tray. one's an inlet and the other one is a drain with adjustable height.

- hose with the appropriate size for your pump and kit.

- elbows, tees, connectors, and other hose accessories. i honestly had no idea what i'd need and just ordered a few of each.

- a submersible pump. to pump nutrient solution to the grow tray. i got an 85 watt one from a store that sells fountains.

- some way to switch things on and off on a schedule. i happen to have an old switched pdu, but a couple of plain old timer switches or wifi relays (e.g. shelly) can do the job.
- plastic mesh pots of various sizes, plastic trays, and grow mediums.
putting it together
starting with the reservoir, you need to drill a number of holes in the lid:
- one for the pump's water pipe.
- one for the pump's power cord.
- one for a drain pipe for each tray you have.
- one (or more, depending on your aerator) for the aerator pipes.

side note: if you don't like plastic shavings all over your office, don't drill plastic in your office.
if you can find gaskets in the right size for these holes that's better. the less light that gets in your reservoir the less likely you'll have algae problems.
then for the trays themselves you need two holes the appropriate size for your flood and drain kit.

next, install the shelves, giving each grow tray around 10u. optional side quest: discover that they're not quite the right size for your rack and kludge it together with long and extremely rickety bolts.
the shelves i got had helpful holes in them so it was straightforward to hang the lights with a bunch m5 bolts.
now put the boxes on the shelves, reservoir at the bottom, thread the pump and aerator pipes and cords through the reservoir lid, terminate all the power cords, cut and connect the pump and drain pipes, and you're almost ready to plant.

planting things
i started with seeds in a tray of rockwool. i was surprised how quickly the lettuces germinated, some in less than 24 hours. the other seeds (parsley, coriander, dill, spinach) took a little longer to germinate, and none of basil i tried sprouted.


once they were large enough i moved them to individual mesh pots and added clay balls or perlite.
one thing that didn't go so well: when the tray is flooded, some of the pots would float and then comically tip over. i managed to deal with this by sterilising some rocks and putting them at the bottom of the pots, but it feels like this should not be happening in the first place. maybe i should look into making a framework to hold them in place.

schedule
i started with 18 hours of light and 4 flood cycles a day. over time i adjusted the flood cycle count to deal with signs of algae or dryness in the plants, and ended up with just two.
naturally, since the equipments are plugged into a pdu they are controlled by cronjobs:
# (aziz,) light
0  4 * * *	root	ssh plantpower.internal on 2,3
0 22 * * *	root	ssh plantpower.internal off 2,3

# pump
0  7 * * *	root	ssh plantpower.internal on 1
2  7 * * *	root	ssh plantpower.internal off 1
0 16 * * *	root	ssh plantpower.internal on 1
2 16 * * *	root	ssh plantpower.internal off 1
nutrient solution
i found some mystery pink powder that claimed to be an npk 12-12-36 + trace elements fertiliser. it came with absolutely no dosage information at all so i chanced it with 20 grams for 30 litres of water in the reservoir. that seemed to work well enough for the lettuce at least, so i stuck with it. i'll start to play around with this once i get repeatable results.
result
i was bracing for disaster, given how silly this whole thing is, but this worked much better than i expected. so far, i was able to successfully grow a few batches of different kinds of lettuce as well as various herbs, and it only leaked water all over our utility closet just twice.


all that said, if you actually just want to grow stuff, you should probably not do any of this. this is not a serious guide and there are better approaches out there. but you do you. i had my fun with it, learned some things about hydroponics, and ate some delicious salads along the way.