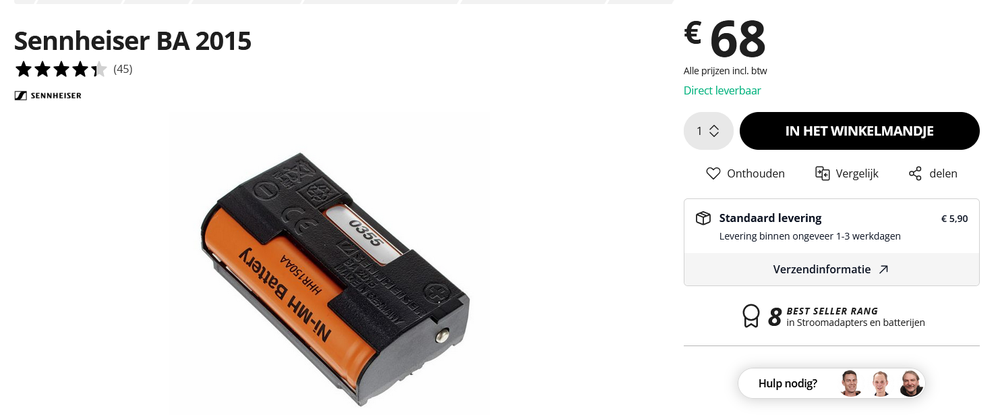
One of the annoying things about electronics is that so many companies must make their own incompatible battery packs. For many products these are expensive but at some level still reasonable, the battery pack contains the protection circuitry and some guaranteed high quality Li-ion cells.
This is not one of those devices. A significant portions of all wireless microphones by Sennheiser use the same BA2015 battery pack. These devices can also take two regular AA batteries but when using those it won't charge them in the dock. So how much would you pay for a bit of plastic around two standard Ni-mh AA batteries?

I think this is a top contender for most expensive package of AA batteries you can get, and I have several microphones that need to have these replaced.
From the official Sennheiser page for these batteries:
It contains two rechargeable NiMH cells and is inserted into the battery compartment instead of two standard AA cells. The battery pack features an integrated sensor which indicates the battery status, monitors temperature during recharging and avoids the charging of non-rechargeable batteries.
The integrated sensor that gives this battery pack all these features is in fact a $0.02 NTC temperature sensor, most of the functionality they list here is actually the battery management chip that's in the microphone, not in the battery pack.
The only real reason for these things to exist is to avoid the charging of non-rechargeable batteries since you can put Alkaline AA batteries in this microphone and run it for a few hours, so this avoids that edge case of someone both owning the super expensive charging docks but removing the original battery and putting cheap non-rechargable batteries in there.
I get that might be a problem and I can't think of a better solution either, but that doesn't mean you have to ask this much money for this. It seems like third party battery manufacturers agree. This is why it's possible to get way cheaper replacement parts for it.

This is a lot better already! And a reasonable person would these in the microphones and be happy. But I'm not a reasonable person.
These packs just contain two cells made by Panasonic that you can just buy. If you go really cheap they can be $.95 per cell, for matching the specs of the original Sennheiser pack it's around $2.50 per cell. The NTC temperature sensor can be as cheap as $0.02 for the SMT part, but to be easier to construct and match the original a more expensive through hole part can be used for $0.20 instead. So for making 5 of these battery packs:

Building a battery pack
The batteries in my microphones have already been replaced by the third party ones, so that means I have some old legit Sennheiser batteries to tear down to make a proper copy.
The first thing I did before breaking open the battery pack was make a rough model of the battery in OpenSCAD while the original still had accurate dimensions.

This is a pretty simple design but it's not very solid because the walls have to be quite thin to make it fit both the batteries and fit the original case size.
After this I opened it up, this had to be done destructively because it seems like the plastic parts are friction welded closed. The cells themselves are also glued in the plastic case.

This is the rear of the original battery pack, nicely showing which cells I should order to replace the ones inside. Both cells are in the same direction and the markings here show which contact is positive and negative.

The negative terminal is just a hole in the case that directly exposes the negative terminal of one of the cells

The positive terminal is the button top of the other cell in the pack. To make this work these are actually two different cells, one is flat top so the cell doesn't poke out and the other is a button top. In my design I'm using two flat-top cells instead and the button contact is actually a tiny magnet.
Now for the magic part that makes the battery pack work:

There is a third contact on the top of the pack. This is used to detect if you have a battery pack inserted or two seperate AA batteries that might not be chargeable. If this contact is blocked by a piece of tape the microphone will act exactly like two regular batteries are inserted and the charging dock will do the whole blinking red led thing to indicate it cannot charge.
With a bit of work I managed to destroy the plastic case enough to take it apart and break the glue layer.

The two cells are welded together with a metal strip to connect the positive and negatives and the third contact just connects to a NTC with the other terminal soldered to the side of one of the cells by removing a chunk of the plastic outer layer of that cell.

The NTC also seems to be a tiny SMT NTC in a plastic blob that has wires hanging off it instead of being one of the more regular through-hole NTC resistors. I have not managed to find a part that looks exactly like this. But after measuring it it looks like this is a 10kΩ NTC with a beta value of around 3200k.
Case design
Compared to the initial draft I made of the case before tearing down the original I have decided to rotate the print by 90 degrees to print it on its side. This means the very thin tabs that hold the ends of the battery won't break off as easily because there aren't layers aligned with that stress line anymore to break off. It also makes it possible to print more of the features without any supports.

A few small details have changed here like the tab on the positive terminal now has a 45 degree chamfer on it to print it while it hangs mid air. The only supported part of the case is now the tab that sits on the top of the pack that has the temperature sensor contact. This prints very nicely though with a tree support.

Another important part is the electrical connection. I made a hole through the case that gives enough room to fit a bent paperclip through the length of the case which connects the two cells together. With this all together this produces a reasonably solid battery pack that together with the microphone case makes a solid connection. I have included the OpenSCAD code for the case at the bottom of this post.
Conclusion
It is absolutely possible to do this, but the resulting battery pack won't be nearly as solid as even the third party packs that are available. With the amount of time required to fiddle with the connection paperclip and winding the temperature sensor leads around a tiny plastic tab it is probably not worth it to print your batteries.
It is very annoying though that the official packs are so ridiculously expensive. Sennheiser is not a printer company, the microphones are not subsidized by the massive cost of a battery and if it cost Sennheiser really anywhere near this to produce them they should have a word with their vendor...
Clearly the third part cells prove it can be economical to not rip off your customer base.
Code
outer_x=51;
outer_y=28;
outer_z=15;
channel=0.5;

module cell(terminal=0, terminal_r=2.5) {
    color("orange")
        cylinder(h=49.5, r=14/2, $fn=90);

    color("orange")
        translate([0, 0.3, 0])
        cylinder(h=49.5, r=14/2, $fn=90);


    if(terminal>0) {
        translate([0, 0, -terminal+0.01])
        cylinder(h=terminal, r=terminal_r, $fn=90);
        translate([0, 0.4, -terminal+0.01])
            cylinder(h=terminal, r=terminal_r, $fn=90);
    }
}

module triangle(short_edge, long_edge, length) {
    linear_extrude(length) {
        polygon([
            [0, 0],
            [long_edge, 0],
            [0, short_edge]
        ]);
    }
}

difference() {
    union() {
        cube([outer_x, outer_y, outer_z]);

        // Positive terminal tab
        translate([-2, outer_y-4-6, 0])
        cube([2, 6, 1]);
    }

    // Make positive terminal printable from side
    translate([-2, outer_y-4-6, 0])
    rotate([0, 0, 0])
        triangle(2,2, outer_x+2);


    // Main cutout for space in the front
    difference() {
        translate([1, -0.5, 6])
            cube([outer_x-2, outer_y+1, 10]);

        // Connection tab for temperature sensor
        translate([outer_x-5, outer_y/2-1.5, outer_z-2])
            cube([5, 3, 2]);
        translate([outer_x-5-2, outer_y/2-2, outer_z-2])
            cube([2, 4, 2]);
    }

    // Bottom chamfer 1
    translate([-1, outer_y, 0])
    rotate([-90, 270, -90])
        triangle(2,3, outer_x+2);

    // Bottom chamfer 2
    translate([-1, 0, 0])
    rotate([90, 0, 90])
        triangle(3,8, outer_x+2);

    // Cell 1 (negative terminal)
    translate([-0.75+outer_x, 7, 8])
    rotate([180, 90, 0])
        cell(terminal=10, terminal_r=4);

    // Cell 2 (positive terminal)
    translate([0.75, 7+14, 8])
    rotate([0, 90, 0])
        cell(terminal=10);

    // Channel for the cell cross-connection wire
    translate([0.75,outer_y/2+3,1.5])
        cube([outer_x-1.5, channel+0.2, 10]);
    translate([1.4+(channel/2), outer_y/2+3, 1.8])
    rotate([75, 0, 0])
        cylinder(h=12, r=channel/2+0.6, $fn=90);
    translate([1.8+(channel/2), outer_y/2+3, 1.5])
        cylinder(h=12, r=channel/2+1, $fn=90);

}