Heikki Lotvonen | written on 4.2.2026
I spent a better part of December on building Mr. Baby Paint, a radically simple co-op drawing app for toddlers & accidentally discovering a flood-fill cellular automata, plus developing pixel-fattening algorithms for bitmap fonts.
Designing software for toddlers: Mr. Baby Paint
I also managed to make and release a new editor during December! It's called Mr. Baby Paint [link: https://glyphdrawingclub.itch.io/mr-baby-paint].
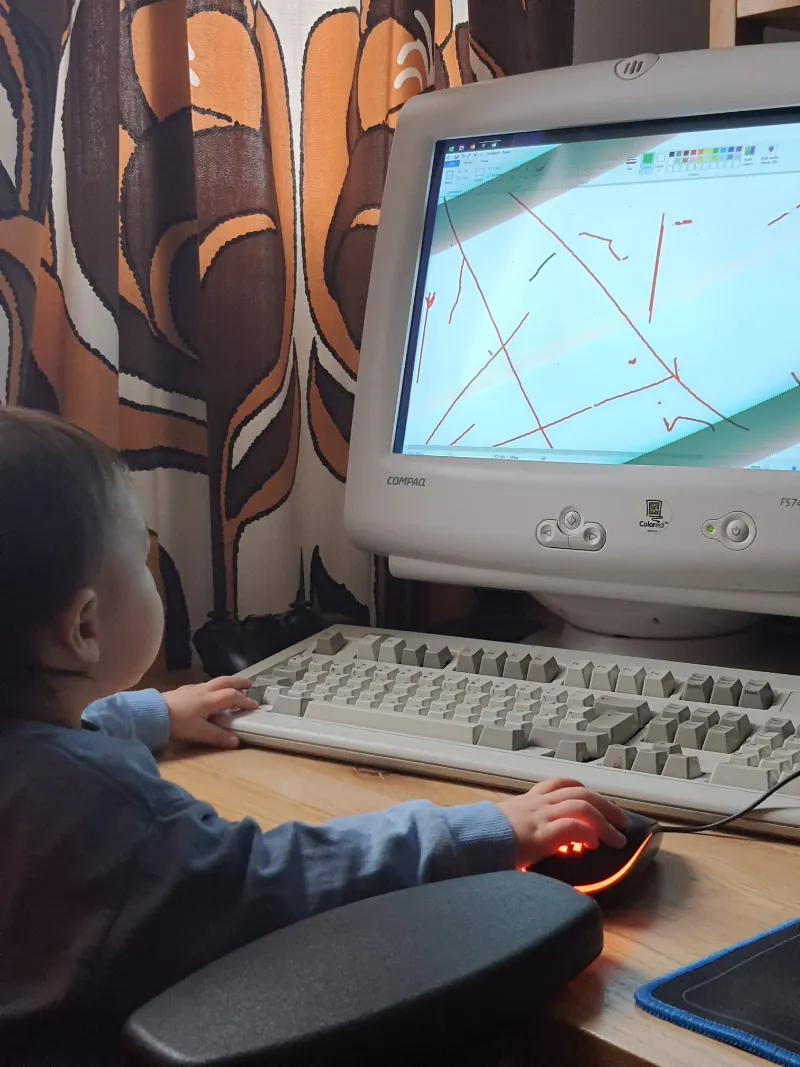
My 3-year old kid wants to participate in everything I do, including computer stuff. He enjoys pressing the springy keys, wiggling the mouse, making it do clicky sounds, and spinning the wheel. But with that kind of skillset, there's not yet a lot he can do with the computer. All I could think of is two things: experimental keyboard-smashing poetry in a text editor, or "action paint" in a drawing app.
We tried both Wordpad and MS Paint. As simple as it gets, I thought. While he did manage to draw some beautiful but random scribbles and produce interesting yet unintelligible letter poems, overall the experience was more frustrating than fun. Because his mouse movements and clicks were haphazard and erratic, and key presses random, I had to constantly intervene to bring back the typing or drawing mode after he "mis"clicked some random menu, toolbar or taskbar item. And changing colors, fonts or other options also meant I had to take the mouse away from him for a bit. He found these interruptions annoying, because he just wanted to keep playing. (But for some reason, when the computer is off, he's not interested in playing with them.)

So, Wordpad or MS Paint wouldn't do, and I couldn't find anything else that would be simple enough for our needs and his skillset. So, I had to make my own. And I wanted to tackle this task with the same seriousness that I would any other software project, and really think how to design a good software experience for toddlers (in co-op with their carers).
The result is a radically simple drawing app called Mr. Baby Paint. At first I thought because the app is simple, that it would be a simple to do, but it turned out to be a much more interesting challenge than I expected, and it produced some surprising outcomes, like accidentally discovering a flood fill based cellular automaton.
Requirements
The minimum viable product I envisioned for this drawing app is as follows: a fullscreen blank canvas with no menus or toolbars, where clicking and dragging the mouse draws directly on the screen. My kid sits on my lap controlling the mouse while I handle keyboard shortcuts with my left hand — CMD+S to save his drawings and CMD+E to clear the canvas. The entire screen is the drawing area, and nothing breaks the experience, not even if he smashes the keyboard.
But, I also wanted the app to be slighlty more interesting and fun than that and really encourage drawing and creative play. Every action should be rewarding, whether they were intentional or not. So every action either makes a mark, produces a sound effect, visual effect, or a combination of these. There's no way to "mess up".
So, left-click draws, scroll drops sand and right-click paintbuckets. The faster you draw, the more paint splatter it produces.

One of the problems I had was that when you move the mouse really fast, the computer doesn't actually register the movement as a fluid continuous curve, but as discrete points in space captured every few milliseconds. This is fine for normal computer use, but unuseable for a drawing app where you want to draw a continuous line. Most drawing apps solve this by connecting each point with a line, which works great for moderately fast mouse movements. But, toddler mouse movements can be really fast, so the distance between the captured mouse positions can be tens or hundreds of pixels apart, making the supposedly fluid curve look very angular. I solved this by using a Catmull-Rom spline to connect the points, which creates a smooth continuous curve between points. Then, I just stamp the brush texture along the curve every 1px. This approach was laggy for larger brushes, so I had to limit the stamping distance for them.
The UI
Instead of requiring precise mouse control, I made use of the erratic mouse movement: moving the cursor anywhere on the screen edges changes some setting:
- Left edge of the screen is divided into 16 segments, which controls the brush size AND the selected font.
- Bottom edge of the screen is also divided into 16 segments, for selecting one of 16 colors.
- Top edge is divided into 64, for selecting one of the following characters: "A B C D E F G H I J K L M N O P Q R S T U V W X Y Z a b c d e f g h i j k l m n o p q r s t u v w x y z 0 1 2 3 4 5 6 7 8 9 ! ?". One of the fonts is a set of icons and shapes instead.
- Right edge is divided into just two: circle and square brush.


Co-op paint
In reality, it's not really meant for toddlers to use all by themselves, but the idea is to (of course) do this activity together with a toddler — so it's more like a co-op paint for parents (or other carers) and toddlers. All of the more complex functionalities are meant to be activated with a keyboard shortcut by the parent while the toddler can focus on the main thing, drawing, without any unneccessary interruptions. For example, it can be difficult for young kids to actually hold down the left mouse button, so a parent can hold down the Alt (or Option on Mac) key to trigger the draw function while their child just moves the mouse around. Other keyboard shortcuts include:
- Draw with Left-Click or hold down Option/Alt
- Fill with Right-Click or Cmd/Ctrl + X
- Pour sand with Mouse Scroll or hold down Enter
- Pause fill and sand falling with Spacebar
- Save the drawing with Cmd/Ctrl + S
- Erase the drawing with Cmd/Ctrl + E
- Undo with Cmd/Ctrl + Z
- Redo with Cmd/Ctrl + Shift + Z
- Close a stroke (drawn line) with Cmd/Ctrl + C
- Select circle brush with Cmd/Ctrl + B
- Select square brush with Cmd/Ctrl + R
- Change color with Alt + Number and Cmd/Ctrl + Number
- Open/close menu with ESC
Fill tool & accidentally discovering a sort of cellular automata
In most drawing apps the fill tool is instant, but I was inspired by Mario Paint [1] where you can actually see the fill happen slowly in real time. It's satisfying to watch it go. In Mario Paint, filling starts at the cursor position, filling line by line in both upwards and downwards direction. In Mr. Baby Paint the flood fill also grows left and right.
In Mario Paint you have to wait for the fill to finish before you can start another one. However, I found that to be unintuitive and unfun in my app. I didn't want any action to block drawing, I wanted multiple fills and drawing to happen simultaneously.
But when I implemented that function, I accidentally discovered a flood fill based cellular automata. And by "discovered", I mean it literally: I was just test spamming the flood fill until patterns started to emerge!

Here's how: I started a new flood fill near the inside edge of another growing flood fill. Because the "growth budget" for flood fills is shared among all flood fills, and are capped at growing 1000 pixels per frame, newer flood fills grow faster than older ones because they are smaller. So, the smaller fill started colliding with the still-growing edge of the older fill. And then, I placed yet another flood fill with the same color as the first one, they all started collapsing into each other, forming very organic looking patterns that ripple and shift. It's semi-stable: they can go for thousands of generations before settling into a stable oscillating pattern, or sometimes one flood "wins" and the others disappear. It's a fun glitch so I left it in.
(Technical sidenote: I do everything on the CPU in one thread, so calculations are sequential, which is required for the flood fill automata to work. I did try a GPU version with a compute shaders, but while it's faster and produces no lag, it's somehow more boring. The inherent slowness of CPU based calculations is a deliberate design choice, although I did my best to keep everything running at reasonable framerates.)
My friend Adel also suggested I try different fill patterns, so I made a little demo where the fill color automatically changes between black and white, so the glitch is super easy to achieve.
Instructions: Click to start a fill, and then immediately start another fill close to the inner edge of the first fill. Patterns should start to emerge. You can also click the "Auto" button" and wait until patterns emerge. You can design and customize the fill patterns, and even change them mid-fill. Download the image by right-clicking on the canvas, then Save Image As...
Mr. Baby Paint is also the first app I sell. Just wanted to see what that entails. I've sold about 30 copies so far! It's available for Mac, Windows and Linux and you can get it on itch.io for 4.99$.
Pixel fattening
Mr. Baby Paint has 16 fonts. Most of them are from various old school computers, like the original Apple Macintosh. I sourced them from Rob Hagemans' Hoard of bitfonts [2]. But I wanted to also make a few of my own, so I used my single stroke font editor for that. It already had a bitmap renderer, which draws the fonts with 1px strokes, which I could use for the textures. But 1px stroke is awfully thin and I wanted something thicker, and because I didn't want to do it by hand, I made a dozen experimental pixel-fattening scripts that could do it for me.
Here's the original I wanted thicker, straight from my single stroke vector font editor:

The first idea was extremely simple: sample each pixel, and place a bigger square at every black pixel. This was of course not great, because it would fill in important details in lettershapes and generally look quite clunky:

So I tried to preserve the details and gaps, while increasing the line width...
I tried Jump flooding algorithm (JFA) distance field with second-nearest component distance to stop expansion at the midpoint between components:

Which didn't work so well, so then I tried JFA distance field with angular gap detection (finds black pixels in opposing directions >90° apart) to estimate and preserve gaps:

Which looked promising, so then I tried the same as #2 but adding a post-processing hole-fill pass that fills white pixels surrounded in all 4 cardinal directions:

Which was even more promising, so then I tried JFA distance field with white-space skeleton (medial axis ridge) detection (pixels near the skeleton are masked to preserve gaps):

Which was already pretty good... but I just had to keep going, so then I tried adaptive per-pixel radius, which uses JFA to compute distance to the nearest different component, then shrinks each pixel's expansion radius to maintain a minimum gap:

I should have stopped at #4, but had to then try the same angular gap method as #2 but with a diagonal tolerance offset and a post-process pass that fills isolated white pixels surrounded by 7+ black neighbors:

Then I got the itch to try a signed distance field (SDF) via JFA combined with 16-direction ray-casting to compute per-pixel maximum safe expansion before hitting an opposing gap boundary:

...and then I tried a SDF via JFA with per-pixel 8-direction ray-casting narrow-gap detection at render time (so it skips pixels found to be in the middle of a narrow gap):

...and a JFA distance field with 8-direction ray-cast gap detection using a distance-ratio threshold between the two nearest components:

...and Meijster's exact Euclidean distance transform with Union-Find CCL and Voronoi boundary gap detection:

...and an iterative 1px dilation with collision detection which locks pixels where two different components would meet, controlled by a gap-width delay parameter:

...and a topology-preserving iterative dilation which after each 1px expansion backs out any pixel that would merge separate white regions. Or that's the theory, but it failed completely and just resulted in the original crude version:

...and finally, before snapping out of it, a JFA Voronoi boundaries as watershed lines that can never be crossed, plus a white-region merge check as a second guard:

All pretty interesting, but none that were perfect. I settled with method #4:

...which I manually edited and cleaned up in Aseprite:

And here's how it all looks in Mr. Baby Paint. The bigger font is another version with same skeleton, just different size and different stroke applied.

Overall, I'm pretty happy about it! It's chunky, fun and fits Mr. Baby Paint quite well. And now I have a full bitmap based font pipeline that produces different weights and styles quite easily from the same source.
Here's a few extra tests I made. The details are weird, but overall they're surprisingly legible!


Then I have a few of the "failed" tests, but even they're quite legible and could be used effectively in some situations:


And, it works for drawings too! Or any image basically.


And here I've used it for some Ruusut promotional material:

- Mario Paint gameplay: https://youtu.be/MX3HERvqHwI?t=312
- https://github.com/robhagemans/hoard-of-bitfonts