Chapter 1: A Box Of Scraps
August 13 2026
It's an interesting time to be a software dev; the transformer large language model is, in my opinion, the first really new and interesting technological development in the field in a long time. AI coding agents built on this have rapidly become core to working in this profession, and the feeling is kind of like going from doing woodworking with hand tools to using power tools, for better or for worse.
Me, I've only ever been able to trust a piece of technology if I can take it apart and put it together in my garage. The thing where you connect to a service and use a coding agent under somebody else's control bugs me; there's too many ways for this to go wrong. You'll start depending on it and then it'll get taken away from you. This whole technology is exciting, but I don't want to go and connect to some big AI data center somewhere; I want a little AI data center in every home! And we're in something of a computer parts shortage right now (or, maybe the late 2010s were a computer parts surplus?) so to keep things affordable, I'm going to have to build it out of garbage.

The main thing I need here is a bunch of GPUs. I need fast memory going into something that does lots of parallel matrix math and that's what a GPU is. Like I said earlier, though: everything that's designed to run any AI workload at all, or even anything that's known to be good at it, is wildly expensive right now.
Back in 2022, a bunch of companies were trying to make the whole "cloud gaming" thing take off. You know, where you run your video games in a data center somewhere so you don't need to buy an expensive gaming PC or console. AMD took one of their workstation GPUs, gave it some extra RAM and removed all of the video outputs. They called the resulting card the "V620". It was never sold to the public, so you might not have heard of it. AMD wildly overproduced these things and then the whole cloud gaming thing didn't work out because of (in retrospect obvious) problems with lag.
These cards aren't really designed for AI workloads and AMD's software support is notoriously bad, so these things are relatively cheap to buy from the "used server hardware" e-waste resellers on eBay. I don't think the ones I got had actually ever been used, they look basically new. They each have 32GB of pretty fast VRAM. Sure, they have a reputation for being bad at the thing I want to use them for, but how hard can it be to get this to actually work?
Oh, they don't have fans, btw. They're server cards, they expect the server to cool them with some extremely loud blower fan. We'll get to that in a minute.

We're in a parts shortage here so I bought some other e-waste to tie the GPU array together. The motherboard is from the X299 platform from 2017, it's from somebody's old gaming rig and was old enough to be cheap on eBay. It has four PCIe x16 slots at the correct spacing for me to stick four GPUs side-by-side, which is the only thing I cared about here. The CPU in it is the Intel Core i9 10900X, which is the worst CPU that Intel has produced in the last twenty years; when it launched in 2019 it was a re-re-re-refreshed version of the Skylake chips, overpriced and power-hungry because Intel couldn't quite catch up with AMD's Ryzen chips at the time, either on processor design or lithography node size. Fine with me, that means it's cheap now, and it'll get the job done!
RAM and SSD were salvaged from other computers around the house. This is cheating, of course; if I had to buy them now they'd be annoyingly expensive. But the requirements here are less severe than you'd think; all of the work will be getting done on the GPU's VRAM; after the model loads from disk these mostly stay idle. If I didn't have salvage parts already, I could go pretty cheap here.
I'm powering four GPUs and Intel's least efficient processor so I got a big power supply. For some reason it was cheaper on eBay to get a 1600W one instead of a 1200W one. I don't expect to be drawing that much power constantly, but I need it to handle everything turning on at once during startup.
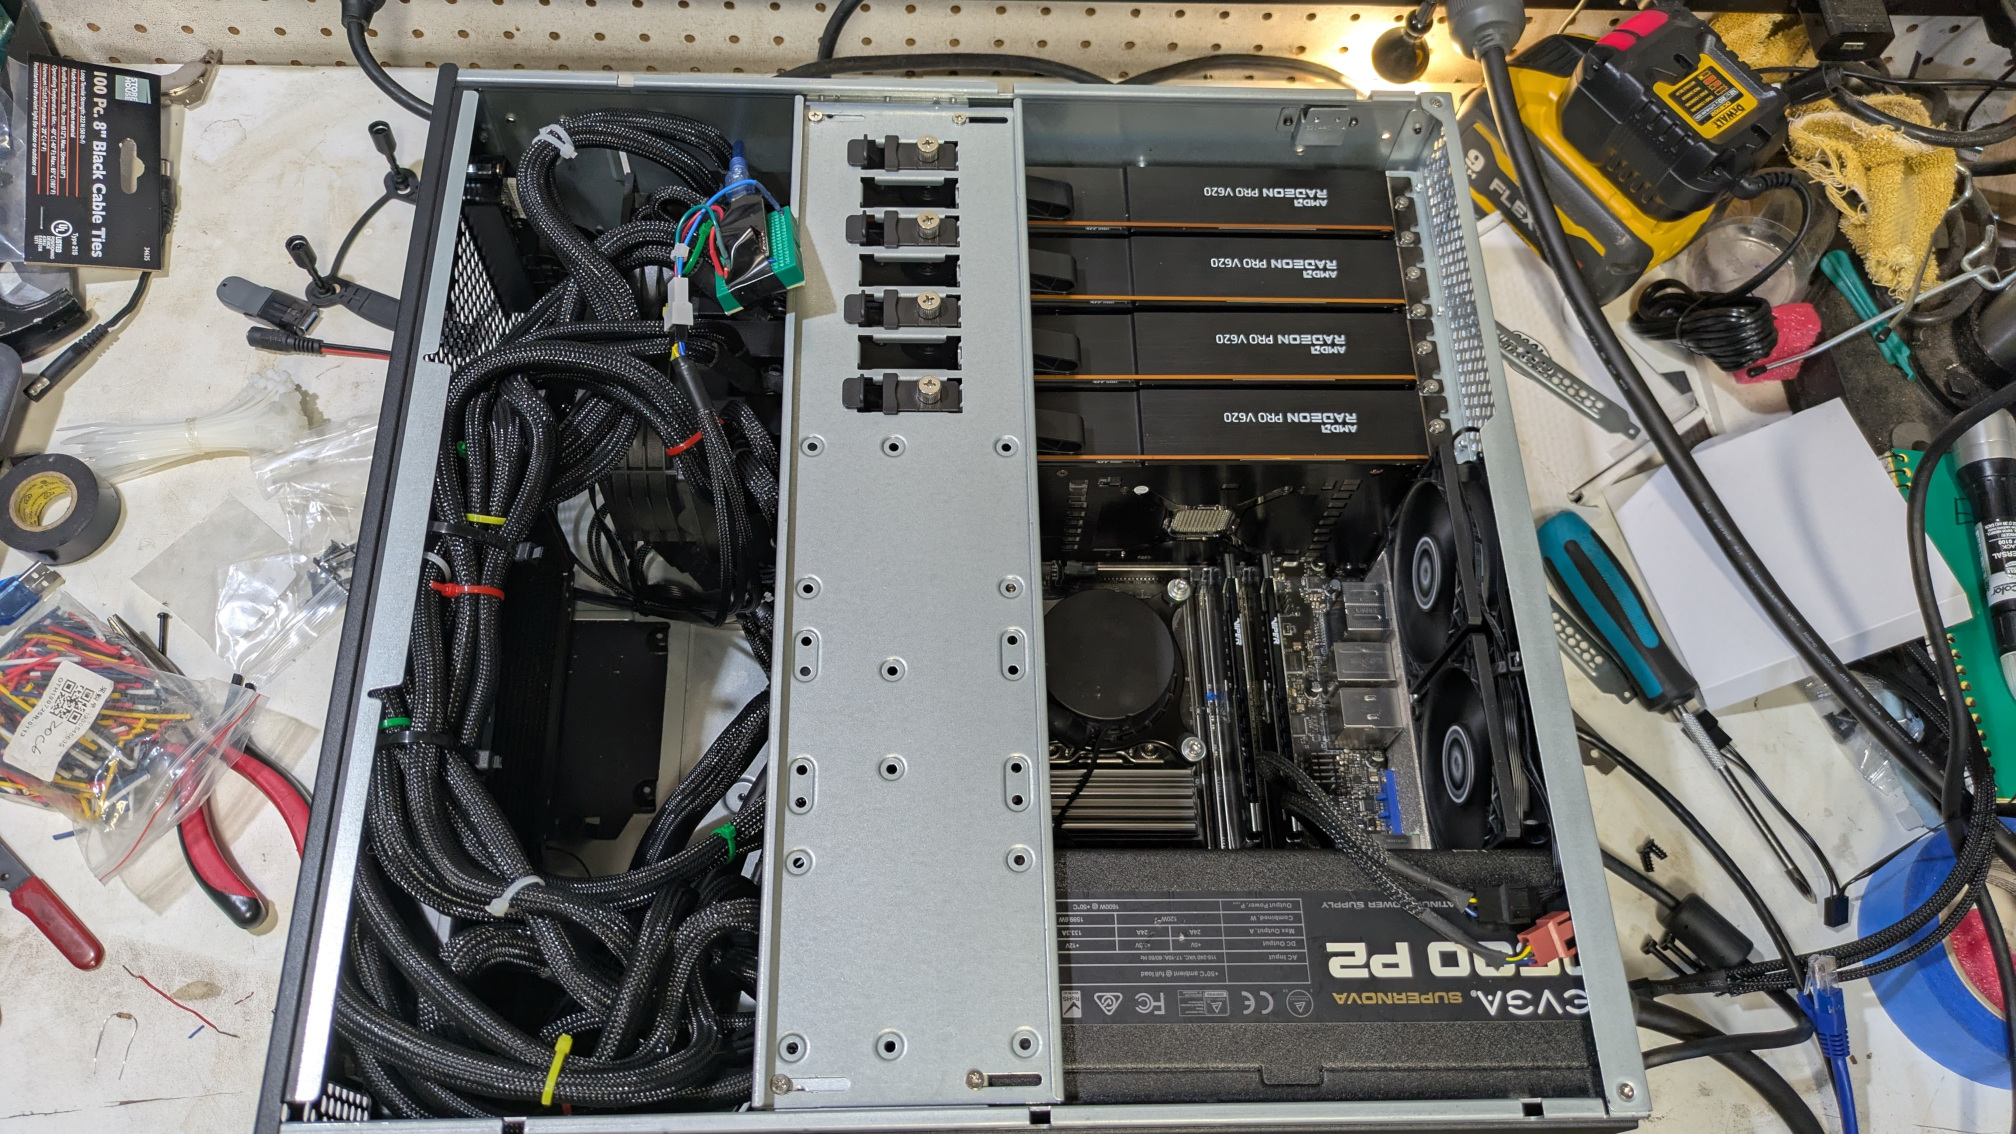
Splurged on a new case and fans. Oh, right, the fans! Those data center GPUs do not have cooling fans, they expect airflow from a wall of server fans. There's a bunch of 3D-printable fan shroud models online if you want to cool one of these cards, but if you stack up four of them side-by-side these all seem suboptimal; they either use a tiny super-loud 40mm fan right at the end, or they stick out way to the side and you can't put a bunch of cards next to each other. Four dual-slot cards next to each other is a width of about 160mm, so what I really want is two 80mm server fans right there, blowing over the cards' heatsinks.

So I modeled and then printed a shroud that would attach an 80mm fan to two cards.1 The cards had some kind of metal cable guide fin on the back, held on by little screws; I used those screw-holes to attach the shroud. There's a cutout in there for the electrical connectors and four holes to mount the fans to the back. I printed this out of carbon fiber ASA, but probably boring old PLA would have worked just fine.
I got these 10,000 RPM fans because I wanted to make sure I was moving enough air, and they were the same price as slower fans. They are really loud! I wanted the motherboard to control their speed based on the GPU temperature, and this didn't work at first, so I just wore ear protection during initial setup.

The box didn't want to boot at first. I probably spent an hour over here wearing earpro standing in the garage playing around with BIOS settings until I figured out which PCIe settings needed to get set in order for the motherboard to actually start up with all four cards connected. (you gotta enable Resizable BAR and MMIO High Size, in two separate menus deep in the advanced option settings, because nobody in 2017 thought you would plug this much VRAM into this board). Around this time I also realized that I didn't have Ethernet in the garage, so I started cutting holes in the drywall at 11:00 PM.

Anyway! After those few false starts, I got this thing to boot and started installing Ubuntu 24.04 on there. With earplugs in and still no fan control, I compiled a build of my favorite inference server, the excellent llama.cpp, and tested out the Gemma4 model, which fits comfortably into one card. This was my favorite local model when I was playing around on a single GPU workstation and it tested out pretty well; not quite as fast as it did on the RTX 3090 that I used to have, but not badly at all. Then I spin up Deepseek V4 Flash, which was the real target for this build. It's slow! At this point I have no idea how to make it fast (more on that next chapter), I just wanted to see if it would fit, and it did.
Back to the fans! Again I cannot stress enough how loud these are. At full blast you can hear them through the walls of the house, and this thing just does not require full blast. The initial plan was to control the fans using the motherboard's built-in fan control, but this board refuses to control different fans at different speeds. Apparently this is common for motherboards from Supermicro. So I built a fan controller instead; I have a whole box of off-brand Arduino Nano clones that I got from Aliexpress in the pre-tariff days; I dug up some code I wrote for a microcontrollers class in college over a decade ago to run a PWM motor and cleaned it up.
The fan controller just gets a percentage from the server; I need a script on the server to read temperatures and scale the fan speed appropriately. And it's an AI server, so I had it write its own fan control script; it seemed fitting. Deepseek V4 Flash is quite capable of this, with the usual amount of guidance and human interaction you need to get decent software out of a lightweight AI model.2 We had a funny moment in there when I told it to think of something to heat up the GPUs so I could test the script, and it starts writing a PyTorch script to do matrix multiplication, and I tell it "no, you are running on these cards, you exist in a llama.cpp instance on this computer, just saying anything will load up the cards" and it had a brief existential crisis. Adorable!
The controller itself is on a prototyping breadboard that I just stuffed into the server case. I put a bit of electrical tape on it so it doesn't short against the case.

At this point the box is pretty stable, I've tested the GPUs out, and I'm ready to really dive into how to get it to run fast, which I'll talk about in the next chapter.