Acoustic cameras are used for locating sources of sounds. You can find online quite a few projects and products of acoustic cameras. However, they are all either complex or expensive (or both). So, I decided to build a simpler acoustic camera. And here’s how.
If you want me to write more on the theory of acoustic camera and beamforming for sound localization, please leave a comment saying so and subscribe for updates.
This project consists of 4 parts:
Capture video and 16 channels audio
Beamform the sound data into sound pressure level
Visualize the sound pressure level
Merge the video with the audio
Let’s get to work.
Surprisingly, during the time of this project, it was actually difficult to find software that captures a 16-channels. I tried Audacity and some CLI tools with no success. However, as with most challenges, a bit of Python code did the trick.
Since I’m using Mac, I started with the built-in QuickTime Player to capture video. However, I quickly realized it wasn’t easy to synchronize the audio and video capture. Again, my solution was some Python code with OpenCV and PyAudio.
You can use my code from this git repo. The recording command is:
./record.shThe outputs of this step are:
video.avi audio.wavGiven the audio capture, we seek to compute the sound pressure level in each direction. We do that using beamforming.
There are actually a few different algorithms of beamform. I just used the base beamformer of Acoular, which is a Python package for beamforming. You need to install this Python package before you can use it.
Acoular uses the h5 format, so you first need to convert the wav file to h5 file.
All code samples below should be executed in Jupyter notebook to render the output image.
from os import path
import acoular
from pylab import figure, plot, axis, imshow, colorbar, show
micgeofile = path.join(path.split(acoular.__file__)[0], 'xml', 'minidsp_uma16.xml')
datafile = 'audio.h5'
mg = acoular.MicGeom( from_file=micgeofile )
ts = acoular.TimeSamples( name=datafile )
ps = acoular.PowerSpectra( time_data=ts, block_size=128, window='Hanning' )
rg = acoular.RectGrid( x_min=-0.2, x_max=0.2, y_min=-0.2, y_max=0.2, z=0.3, increment=0.01 )
st = acoular.SteeringVector( grid = rg, mics=mg )
bb = acoular.BeamformerBase( freq_data=ps, steer=st )
pm = bb.synthetic( 8000, 3 )
Lm = acoular.L_p( pm )
figure(2, figsize=(5,5))
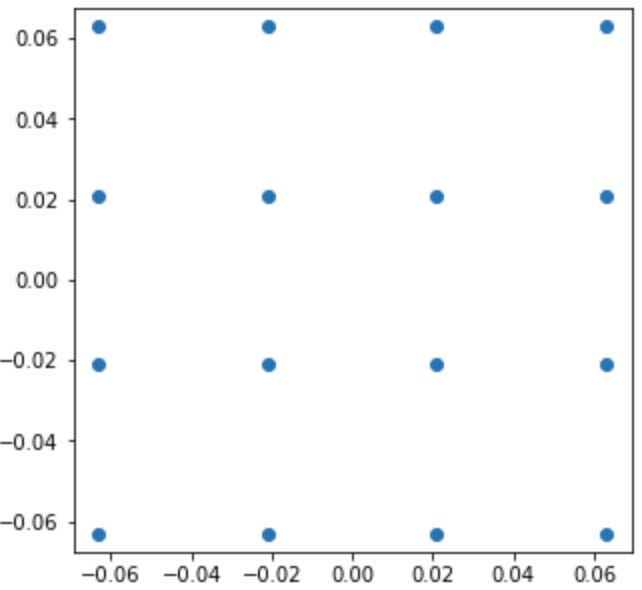
plot(mg.mpos[0], mg.mpos[1],'o')
axis('equal')
show()This code should plot the location of the microphones on the miniDSP UMA-16:

First, let’s plot the beamform result.
imshow( Lm.T, origin='lower', vmin=Lm.max()-3, \
       extent=rg.extend(), interpolation='bicubic')
colorbar()Here we see the location of the sound source during the entire audio capture. The higher the value of the pixel in the graph (yellow), the higher the sound pressure level is. The area of maximal sound pressure level is stretched since the sound source was moving during the record. See the video below.
To correlate the visual and auditory data, we can superimpose the beamforming data over the video as follow:
You can merge back the audio and video. Although I recommend not to do so since the visual result contains all the interesting information. To create a video that contains both video and audio, you can use this FFmpeg command:
ffmpeg -i video.avi -i audio.wav -c:v copy -c:a aac output.mp4 The UMA-16 result above was actually my second attempt to build an acoustic camera. The first attempt was based on ReSpeaker 4 microphone array (~25 USD) with a GCC-PHAT (Generalized cross-correlation) algorithm:
The results were surprisingly good. In the following video, my iPhone is playing white noise, and the red marker points at the location of maximal sound pressure level:
If you want more information on the ReSpeaker 4 microphone array (~25 USD) with a GCC-PHAT algorithm, or any other further information, please leave a comment below or write me.